How To's, Tips and Tricks
Administrator (Unlicensed)
Fatih Yilmaz
Berna Radoncic
Transcoding
Metus Ingest can also transcode the files in your computer.
- Add an encoder. (see Adding an Encoder),
- Select File Source as a video source.
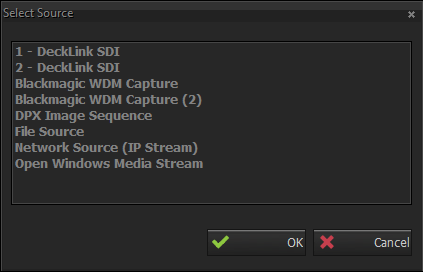
- A folder browser pops up. Select the file you want to transcode.
- Select File Source as an audio source. A folder browser pops up again. Select the file you want to add as an audio source.
- Choose the In and Out point of the file that you want to transcode.
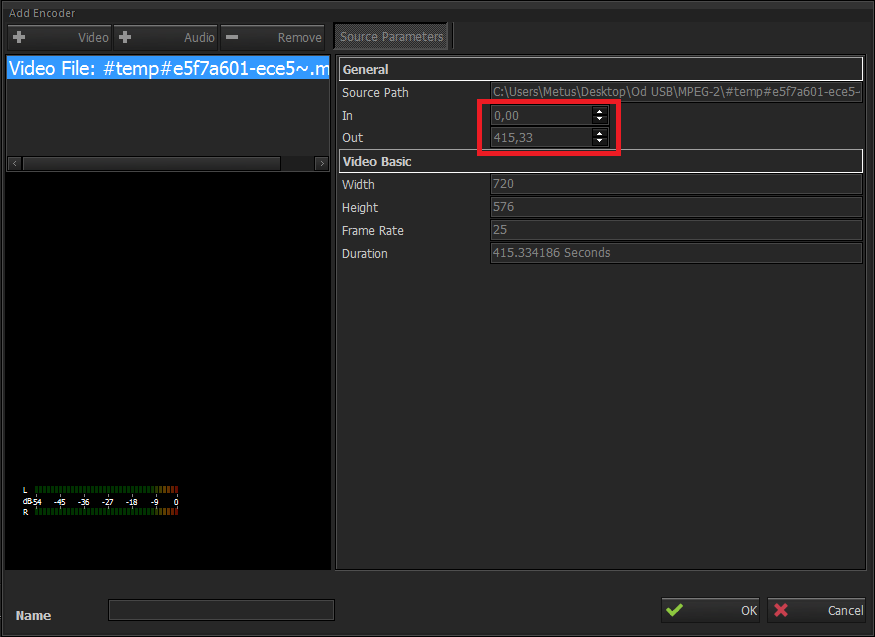
- Click OK button and close Add New Source window.
Now the source is ready. You can choose a desired profile to which you want to transcode to. After choosing the desired profile and output settings, now it is ready for the transcode.
- Click Start from the Encoder menu in order to start recording
When a video file added as a source file, source parameters show source path , width , height values, frame rate and total duration of file. Also in and out values can be entered here , so video will be transcoded from in point to out point only.
NOTE In and out values shall not be entered before an audio source added too. Because, if an audio source is added later, application will not adjust its in /out points due to video source and this may cause to audio synchronization disorder. This situation is also true vice versa.
Audio file’s source parameter tab shows source path, channel amount , sample rate, bit rate and total duration of this audio file. And also in and out values can be entered here. These values automatically change according to the in-out values of video file if a video file added before.
There are three ways to remote control Metus Ingest :
- Remote control from TCP IP Commands (Please see INGEST API - Socket Commands )
- Remote control from Ingest Control Agent ( Please see Ingest Control Agent)
- Remote control from Ingest Control Center ( Please see Ingest Control Center)
Please see METUS INGEST REMOTE CONTROL for detailed info on remote controlling Metus INGEST.
You can capture multi channels of audio as it shown in the picture below.
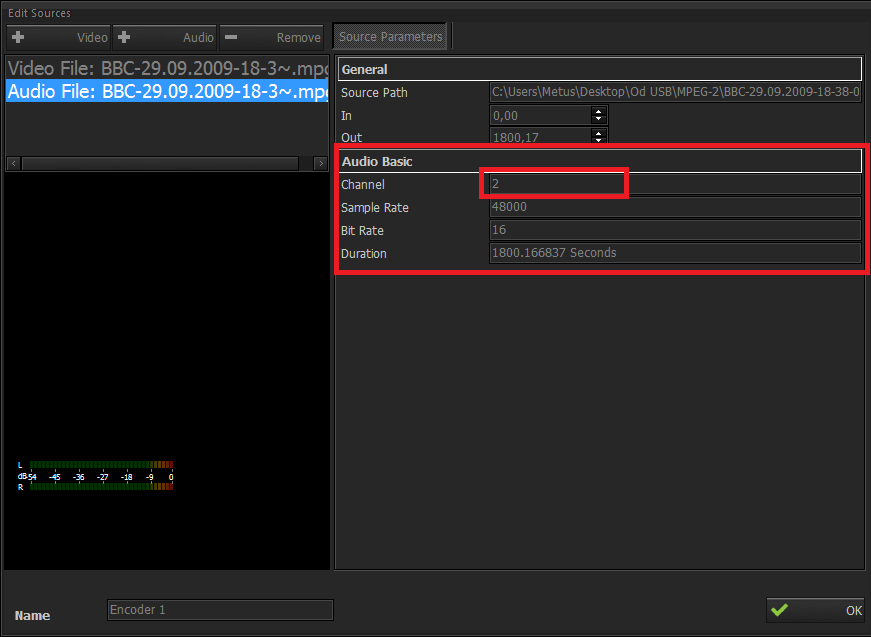
And after adding a profile , you can adjust multichannel audio settings for MPEG , AAC , PCM as it seen at he following pictures.
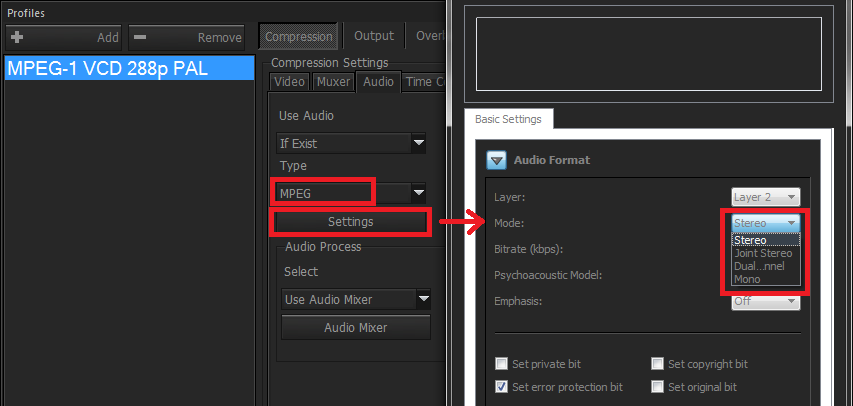
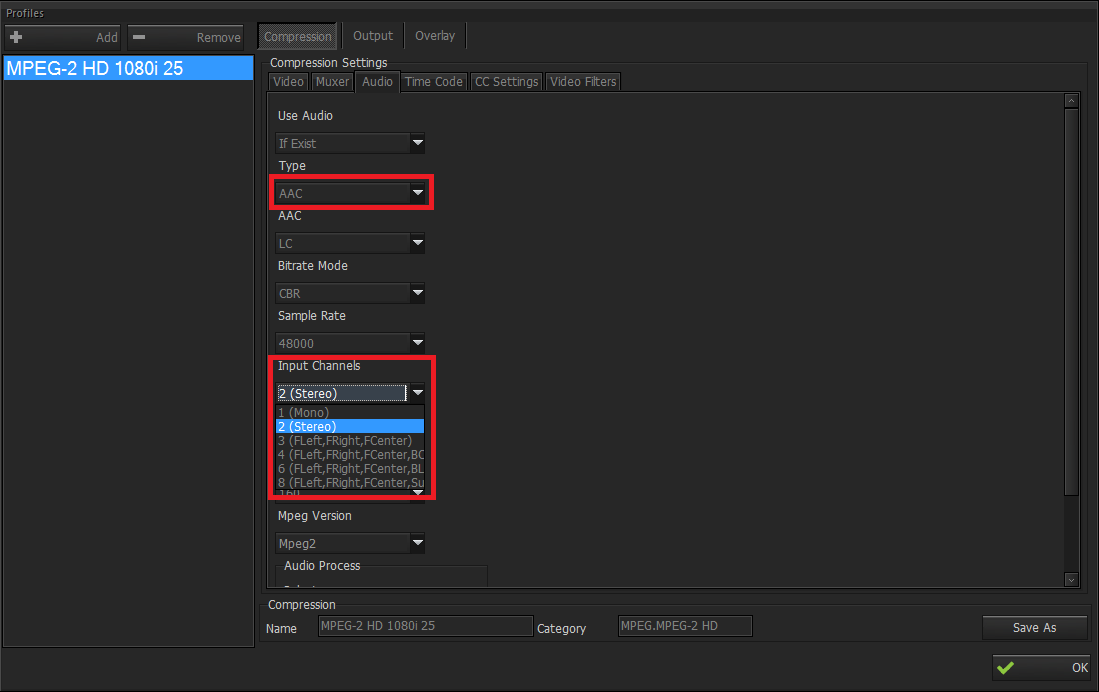
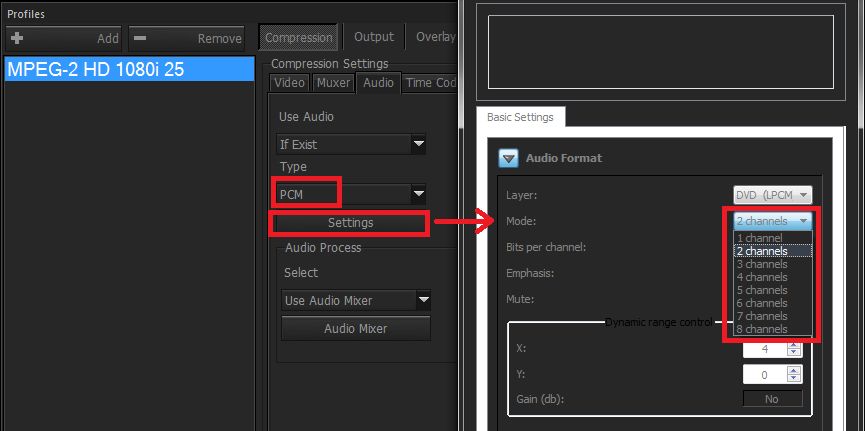
And please see the Compression Settings to have information about Audio Muxer .
Please see Streaming
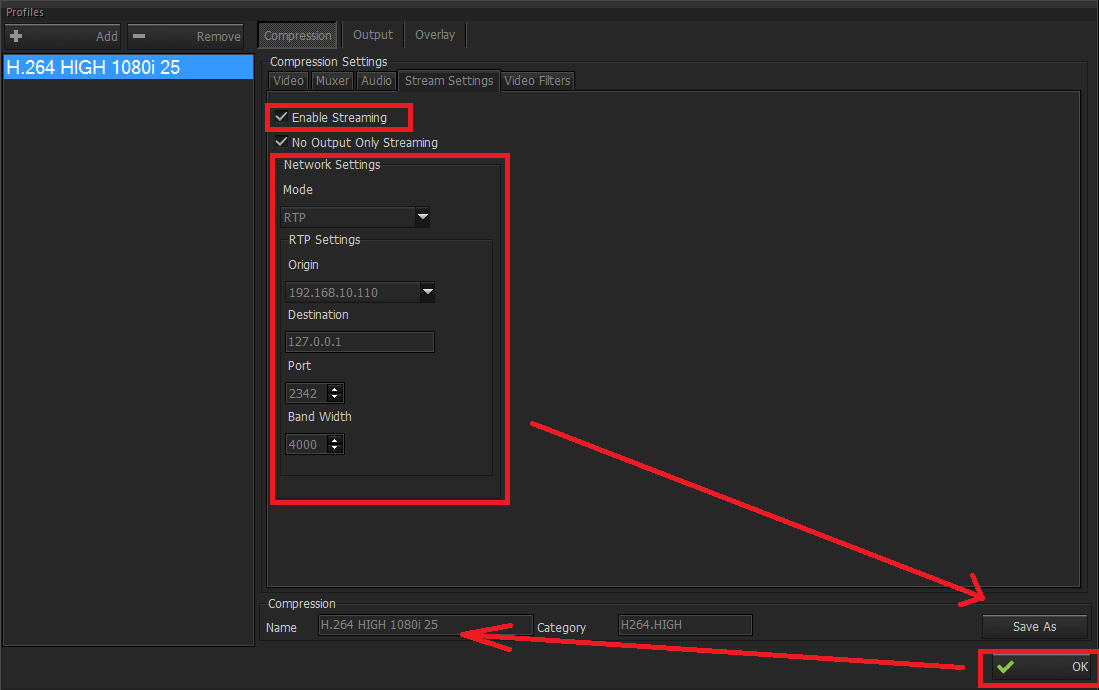
NOTE You can see Stream Settings for a profile from the bottom of Compression Settings tab.
There are two ways for capturing IP Stream in Metus Ingest : DirectShow Network Source and Universal Network Source.
If you want to select DirectShow Network Source first you need to choose your Encoder as an DirectShow Network Source (IP Stream) as it seen at the picture below.
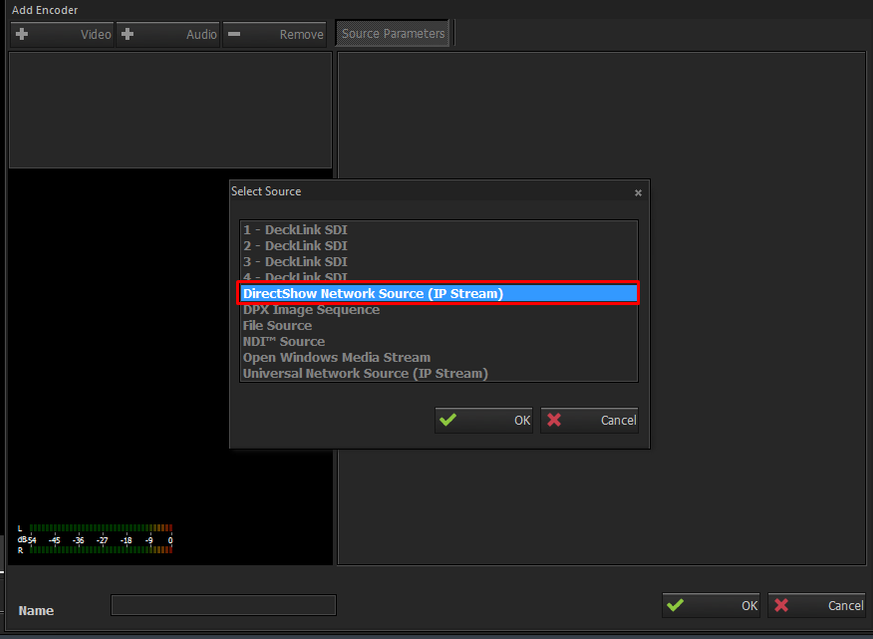
Then click to "Filter Settings" at the opening window . And adjust the "Settings" for IP Stream .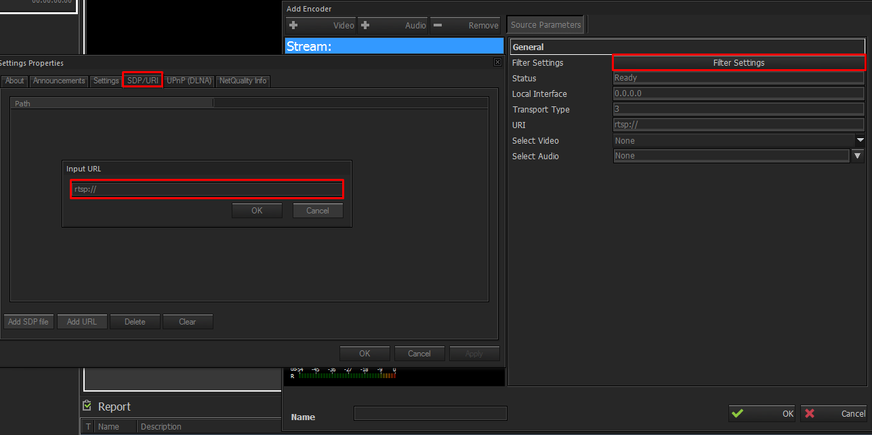
If you want to select Universal Network Source then you should repeate the steps seen in the first image where you select Universal Network Source (IP Stream) as your encoder source( See image below)
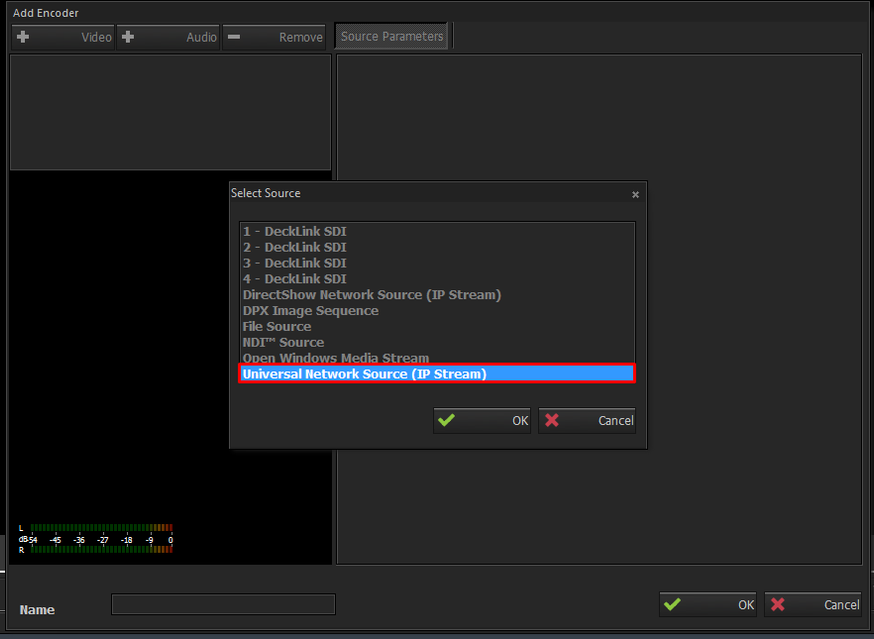
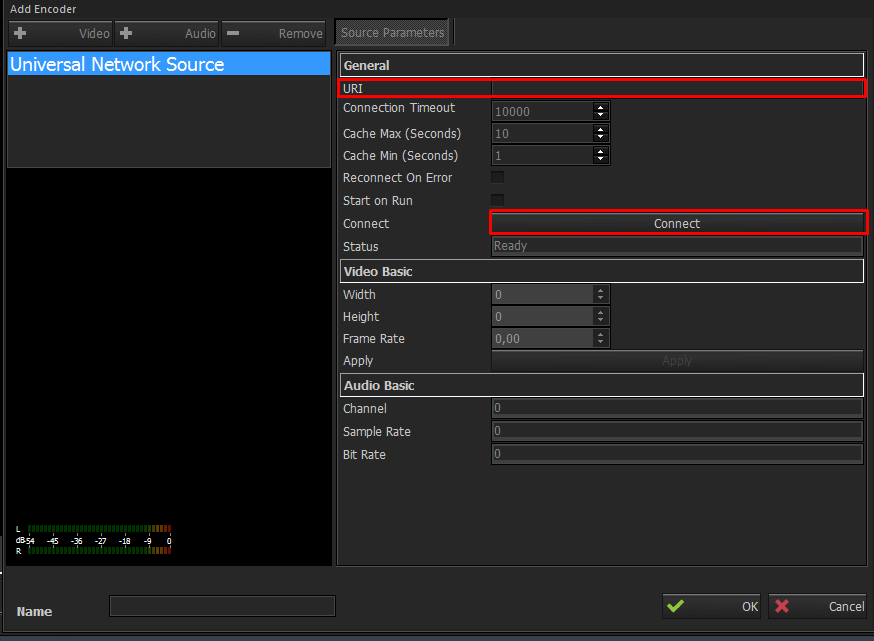
Then paste your IP Stream URL into the ULR section and press "Connect". Also there are additional setting that can be changed showin in the image below :
Metus INGEST can capture MPEG2 based files which can be opened and played by either Metus MAM, Edius NLE and VLC player during the capture. If any other application is desired to play the files that are still being captured by Metus INGEST, than it also depends the capabilities of the player applciation. Please contact us in that case.
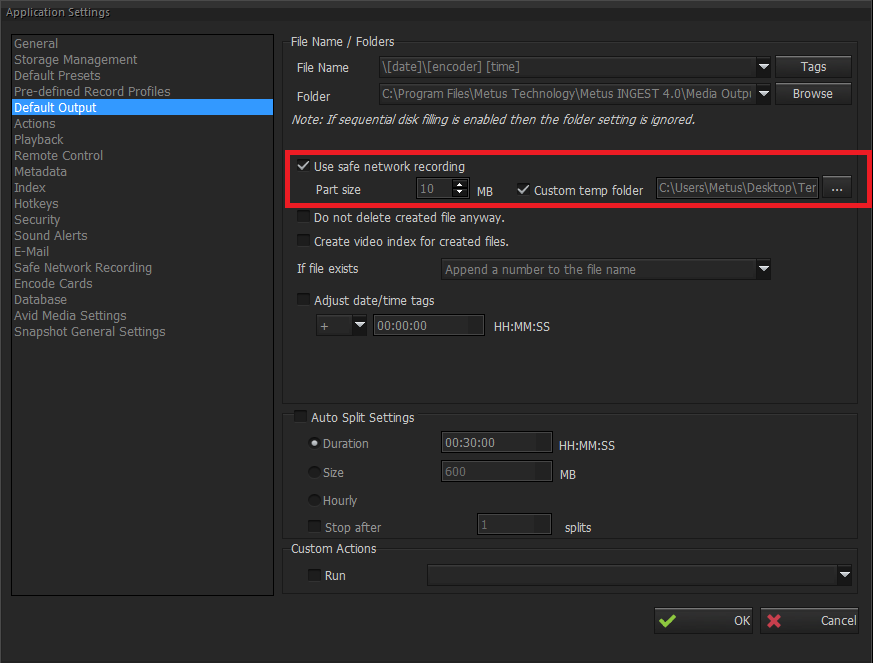
You can use "Safe Network Recording" settings to capture files safely on a network location by following this steps :
- Tools > Options > Default Output
- Check the "Use safe network recording" section .
-Choose Part Size and
-Choose Custom Temp Folder for safe network recording
H.264 encoding is a very CPU intensive process. It is not possible to record more than a single full HD H.264 profile even with the latest CPUs.
Metus INGEST has an answer of course,we use Intel Quick Sync and Nvidia NVENC (GPU-hardware accelerated encoding) engines efficiently. Which means, if you have install Metus INGEST on a Quick Sync or NVENC enabled workstation, than you can capture multiple channels of full HD H.264 video. You will see HARDWARE ACCELERATED tab in the profiles section, and you can select from different H.264 profiles either INTEL or NVENC tab (related to workstation)
For more details, please see Hardware Requirements
Metus INGEST has the ability to record closed captions if cc exist in the source signal.
You can use all Blackmagic Decklink models for closed caption capture. When Blackmagic Decklink is added as your encoder, you have to check 'add captions if present' box as seen below.
And, in edit profile/compression settings, you have to check 'copy source CC if exists' box as seen below.
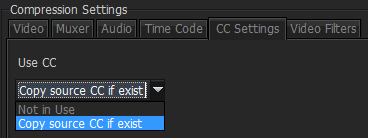
Please note that , closed caption is supported for MPEG2 based video profiles only.
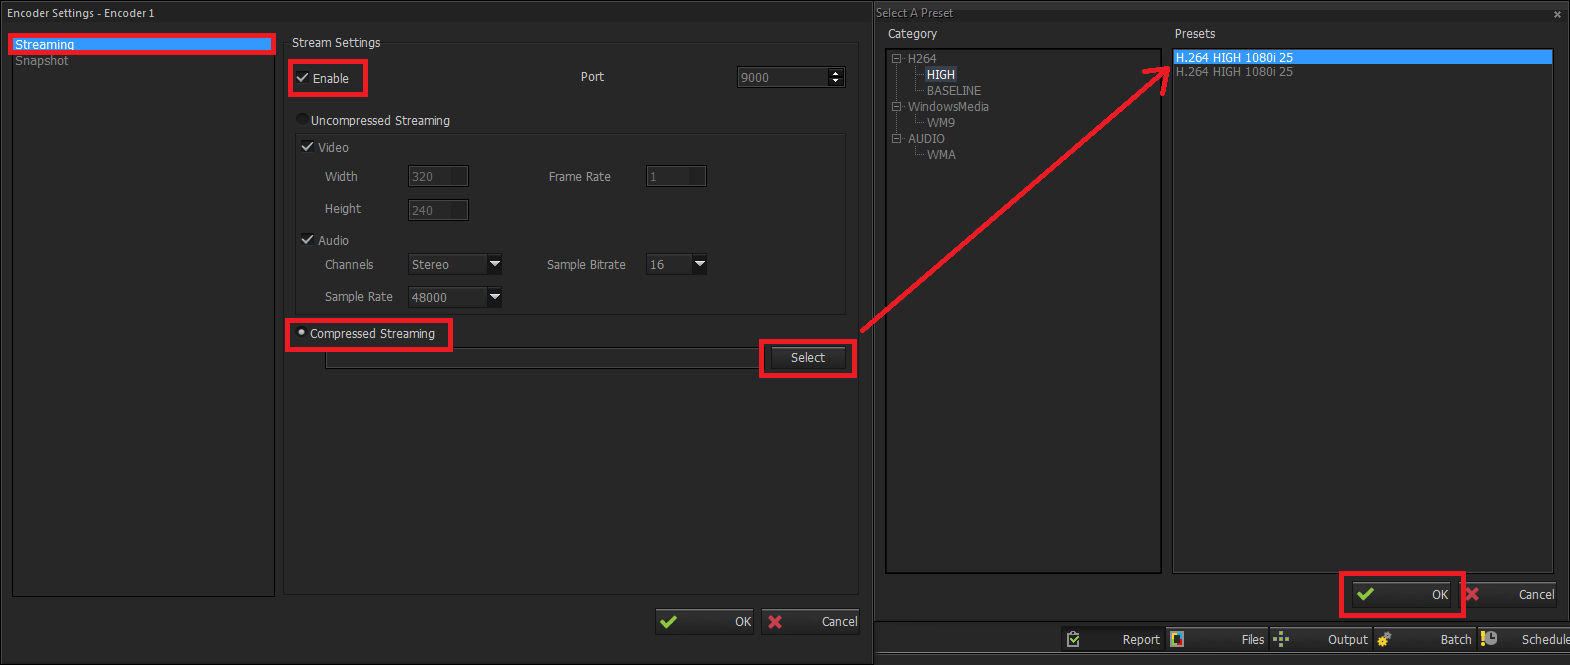
Add an encoder , click to "Profiles" button and choose a profile which you want to define for compressed streaming.
Set the Muxer type to "MPEG TS" as it seen at the following picture.
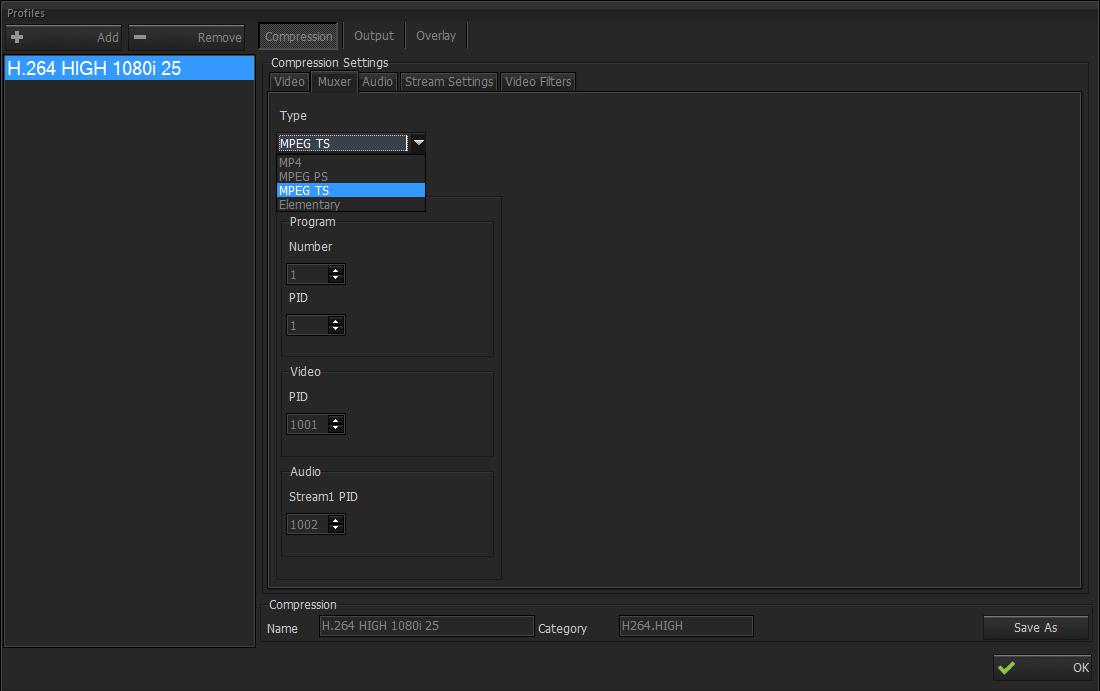
Adjust the "Stream Settings" and click to "Save As" button to save your stream profile with a different name . Then write a name to the "Name" tab for stream profile and click to "OK" button.
Now Right Click > Settings > Stream , you will see your stream profile according to steps at the following picture.
First of all , signal detection need to be supported by your capture card .
If your capture card supports signal detection , you need to adjust E-mail warnings from Tools > Options > E-mail.
To see how to set INGEST to inform user by E-mail warnings click HERE.
First, please see Ingest Control Center and Ingest Control Agent to make sure Ingest Control Center and Agent is properly configured, ready to monitor and control the remote Ingest machine.
For the encoders you want to be able to preview real-time, in the Control Center, select the encoder that you want to preview real-time and check the 'Show Stream' checkbox. The user will be able to preview Ingest encoder source in real-time.
