FAQ
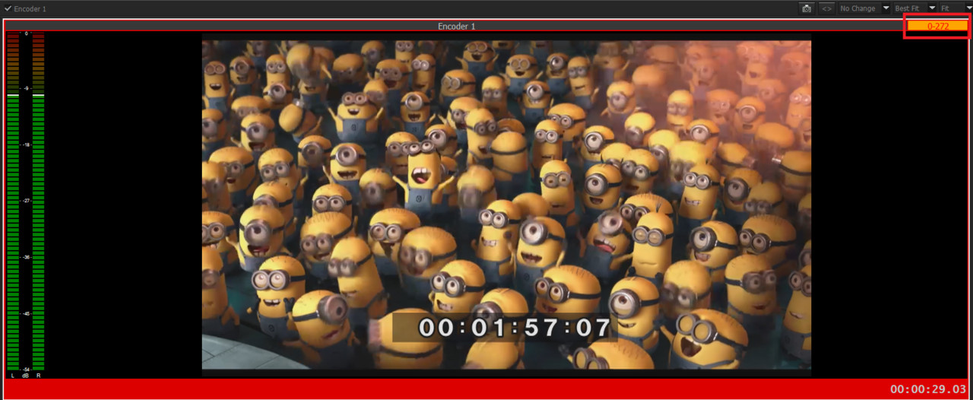
If capture system gets behind the real-time capture for specified video format configuration, encoder starts to buffer frames. Orange label is warning appears when 100 or more frames added in queue. This might happen sometimes when computer is processing another task while capture continues. But if the count rises continuously, it means system is incapable for real-time capture of specified configuration. Buffer count will rise until it fills adjusted percent of the the physical RAM (Default adjustment is %80) and then system will start dropping frames in order to keep up the real-time capture.
The causes of this rise could be either one or more of the following;
- CPU or GPU is not strong enough to encode it in real-time.
- Disk IO write performance is not good enough to keep up.
- Other hardware source is not okay for this type of configuration.
You can capture from more than one VTR at the same time.
Please see detailed information on how to connect VTR and Metus INGEST workstation. Batch Capture Mode
When all VTRs are correctly connected, you can configure your capture profile, and batch capture settings if needed for each one.
Know How
You will need an available RS422 port for each VTR you want to control at the sime time.
Blackmagic Decklink SDI has an onboard RS422 deck control port.
With Blackmagic Decklink Studio and Decklink 4K Extreme you can use the breakout cable and the RS422 deck control port available with it.
If your capture card has no RS422 port, then you can use your on board RS232 port(if available) with the help of a standard RS232-RS422 converter or cable.
The diagram for an RS232-RS422 cable is below;

Supported timecodes are shown below ;
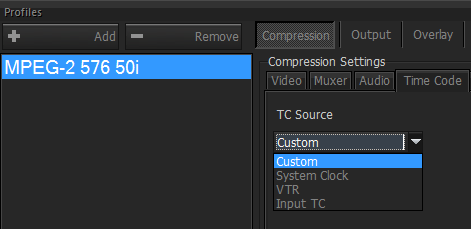
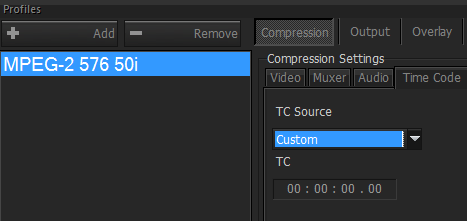
Custom : If you choose "Custom" , you can enter TC manually as it seen below.
System Clock : If you choose "System Clock" , this action adds the your PC 's clock as timecode .
VTR : If you choose "VTR" , you can add VTR's timecode as timecode .
Input TC : If you choose " Input TC" , this action adds VITC or LTC as timecode .
NOTE : LTC and VITC are supported for Decklink Low Level only.
If you are going to synchronize multi inputs this may not provide frame accurate synchronizing. External timecode cards provide better solution for frame accurate synchronizing. It is explained in "How to import Timecode (LTC) via External Timecode Card ?" question.
This feature works with Decklink Cards only.
How To
1) Plug the cable coming from the timecode source to the computer's microphone input.
2) Open the Windows recording devices.
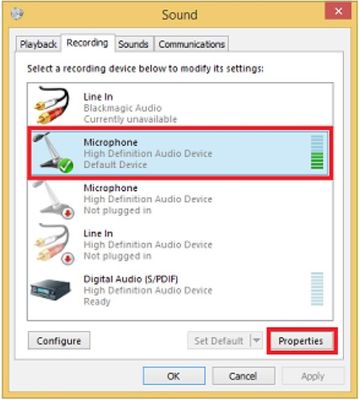
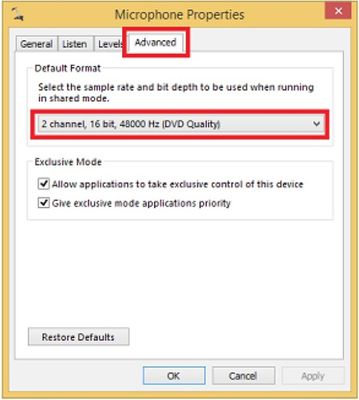
3) Go to the Advanced tab. Select the "2 Channel, 16 bit, 48000 Hz (DVD Quality)" from "Default Format" menu.
Configuring Timecode Settings.
4) Run the Metus INGEST.
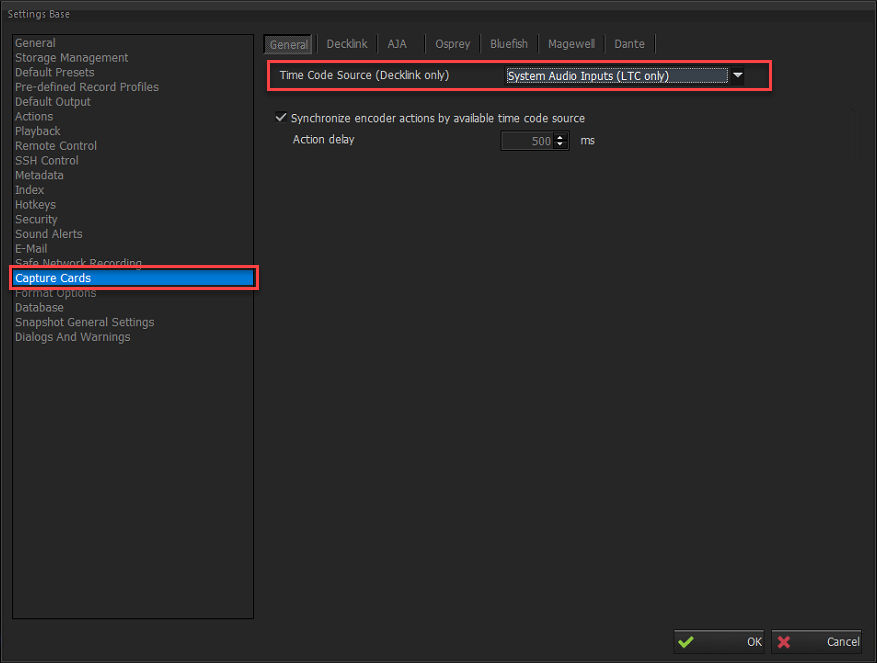
5) Go to "Tools > Options > Capture Cards" menu.
6) Select "System Audio Inputs (LTC only)" option from "Time Code Source" menu.
Adding an Encoder.
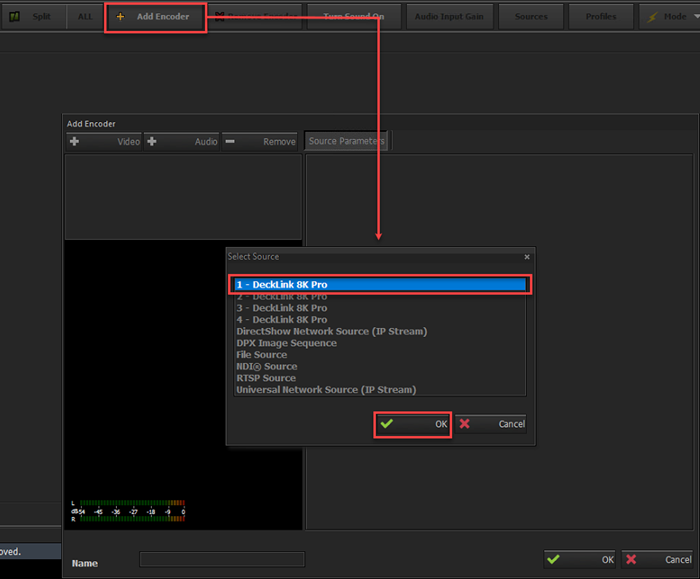
7) Click the "Add Encoder" button.
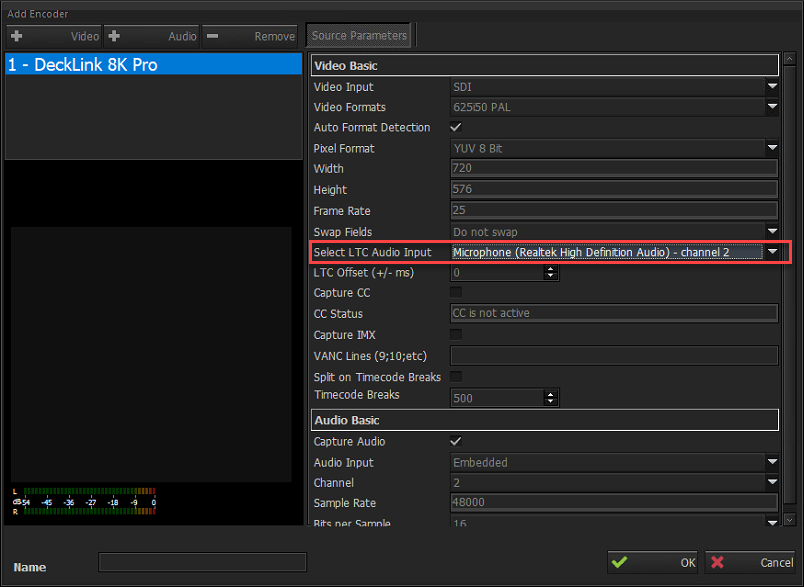
8) From newly appeared window select a Decklink card as a video source.
9) From "Source Settings > Select LTC Audio Input" menu, please select the microphone input.
10) Click on "OK" button and continue with next step.
Adding a Profile and configuring preset settings.
10) Click on Profile menu and add a preset.
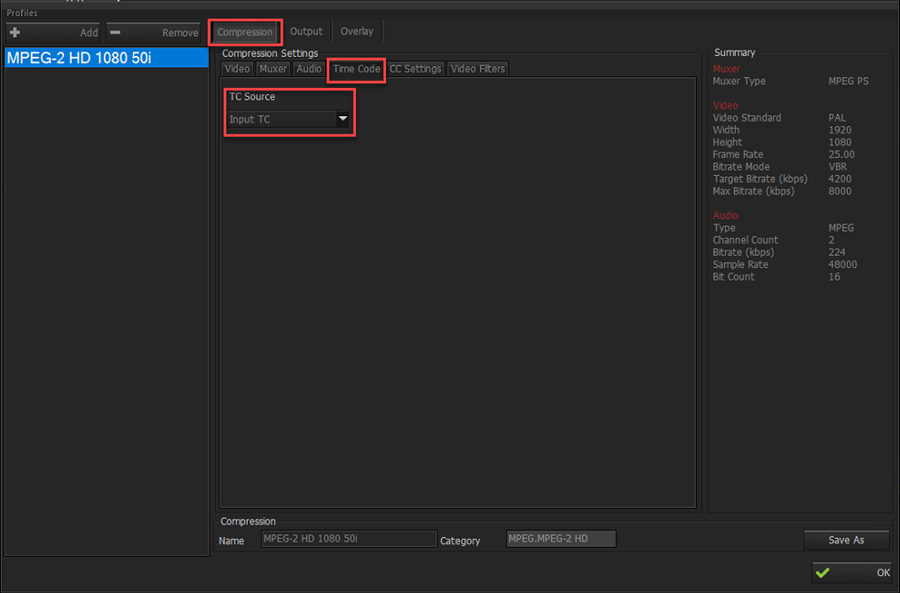
11) After you have added a preset, please go to "Compression > Time Code > TC Source" menu from the preset settings and select "Input TC" as a timecode source.

In order to observe the Timecode on the preview screen, please follow below instructions.
Adding a Timecode Preview.
1) Right click on "Encoder".
2) From newly appeared window select the "Settings" menu.
3) Open Encoder Settings.

4) Select Preview menu.
5) Select "External" timecode type from the "TC Type" drop down menu.
6) Click on "OK" button.
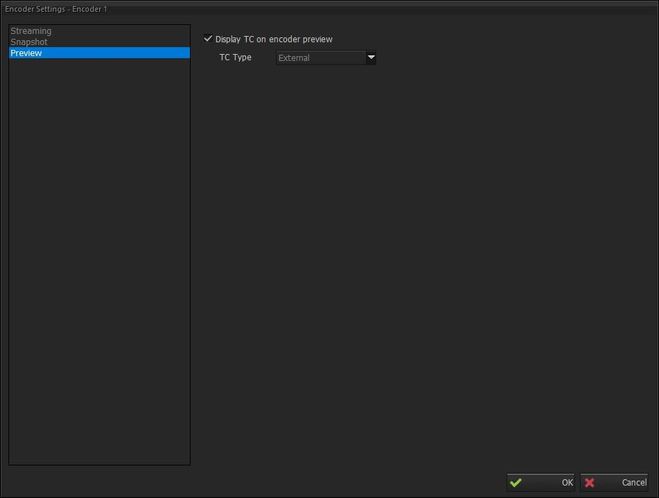
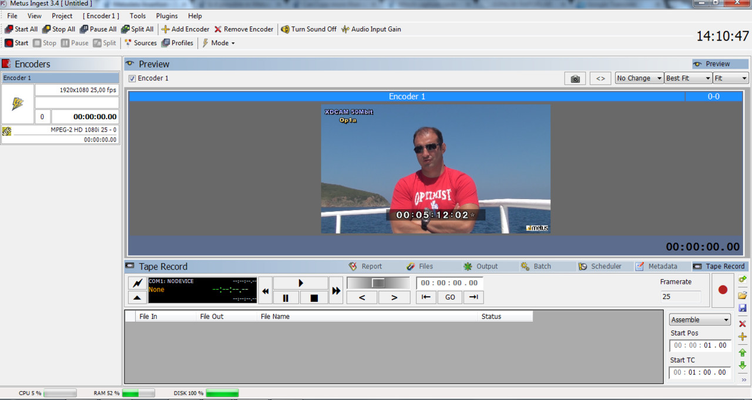
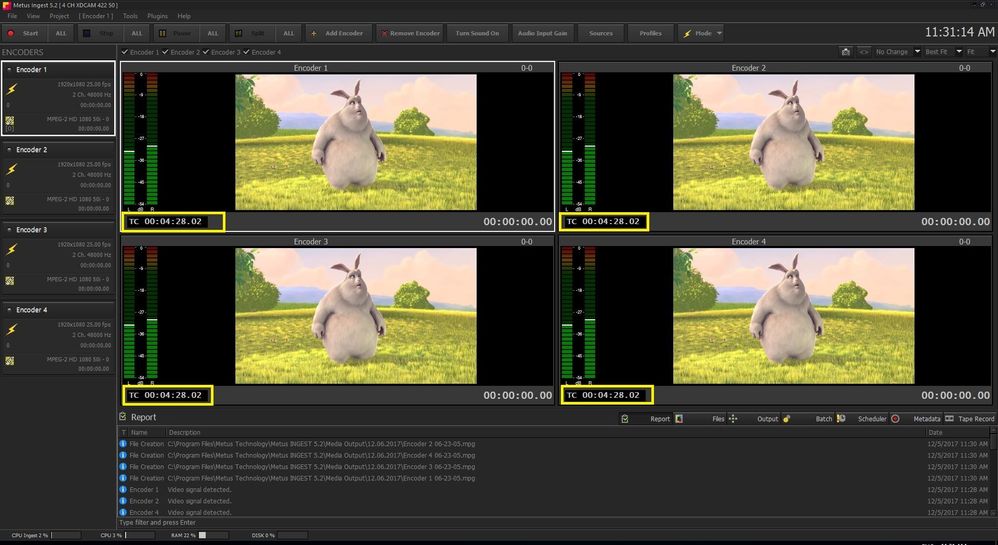
6) Timecode counter will appear on the left bottom corner of the encoder preview screen.
Configuring Timecode Settings
This feature works with Decklink Cards only.
Step 1. Run Metus INGEST.
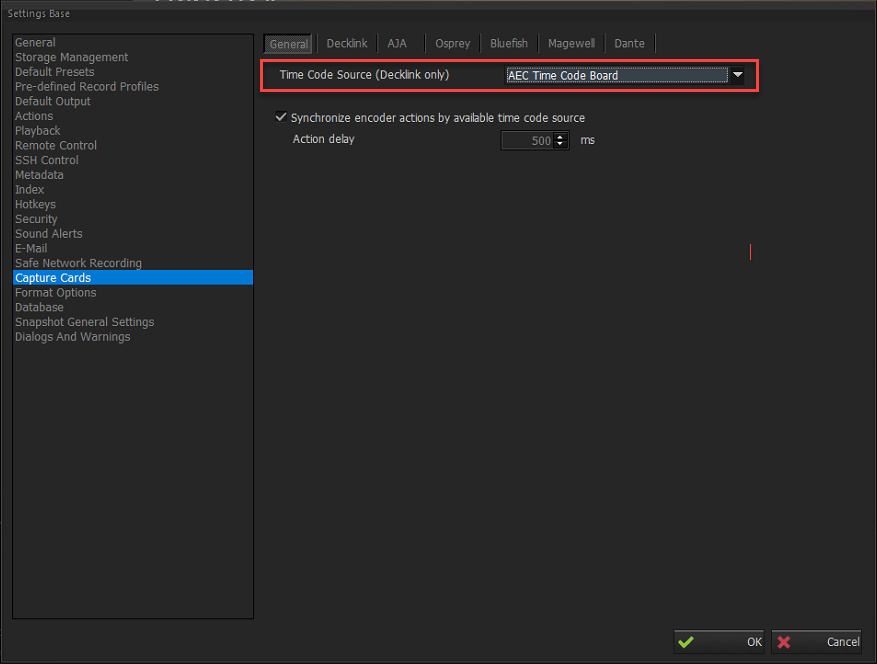
Step 2. Go to "Tools > Options > Capture Cards" menu.
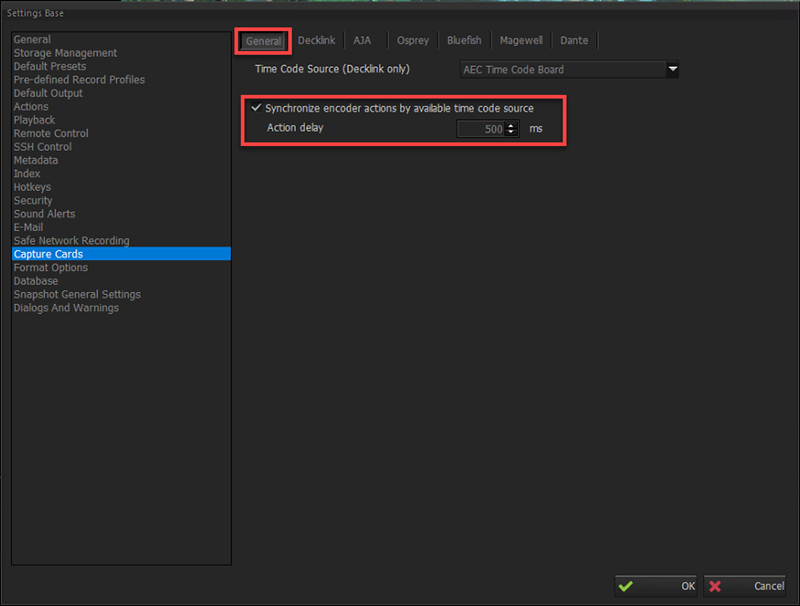
Step 3. From the Capture Cards menu please select “AEC Time Code Board” as a timecode source.
Step 4. In order to apply settings click “OK” button.
Adding an Encoder
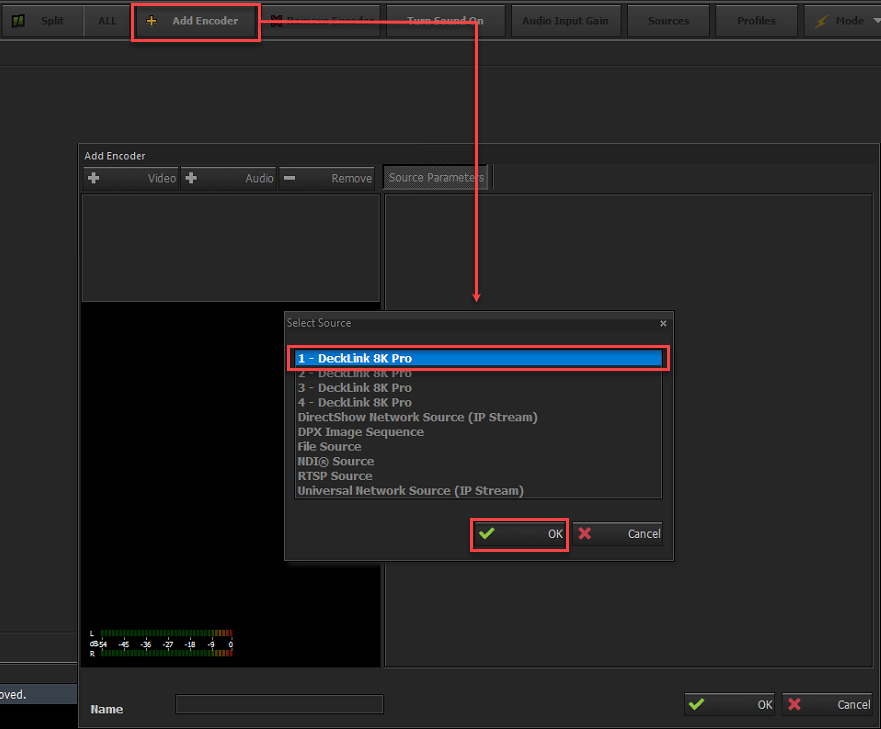
Step 5. Click the "Add Encoder" button
Step 6. From newly appeared window select a Decklink card as a video source.
Step 7. Click on “OK” button to add the video signal.
* On the next window the timecode status will appear on the source settings as an “External TC Source (Time Code Card)”.
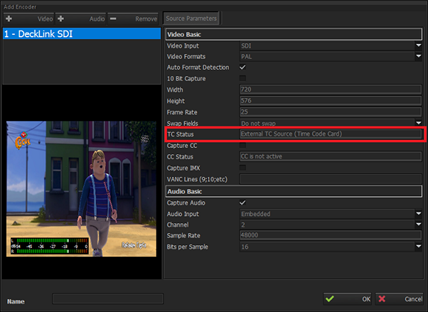
Step 8. To continue to configure the next settings click on “OK” button.
Adding a Profile and configuring preset settings.
Step 9. Click the "Profile" button and add a preset from the list.
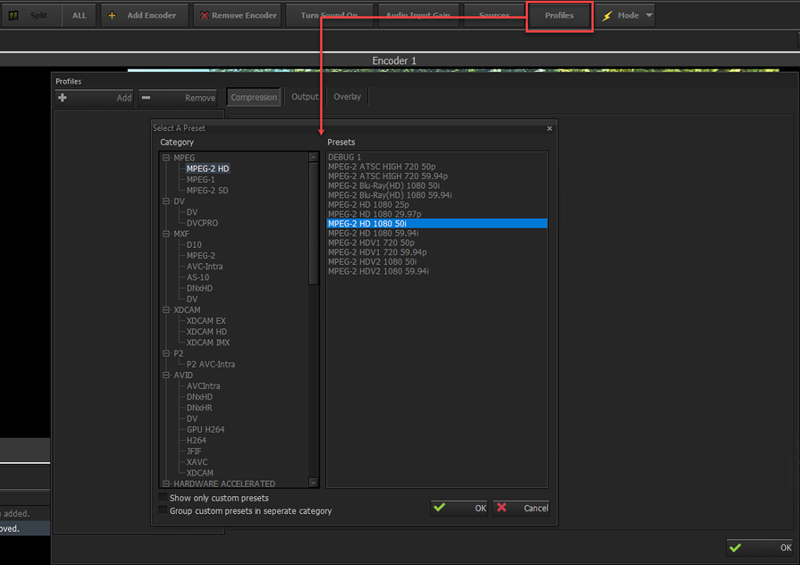
Step 10. After you have added a preset, please go to "Compression > Time Code > TC Source" menu from the preset settings and select "Input TC" as a timecode source.
Step 11. In order to apply the settings click “OK” button.
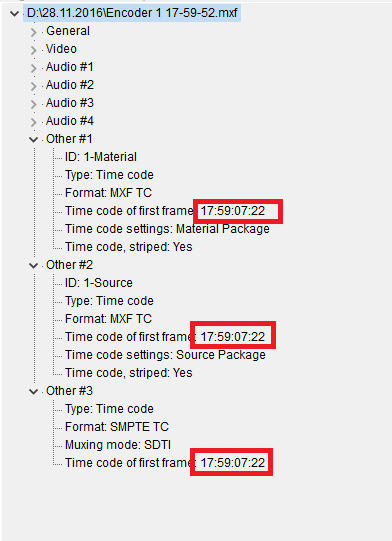
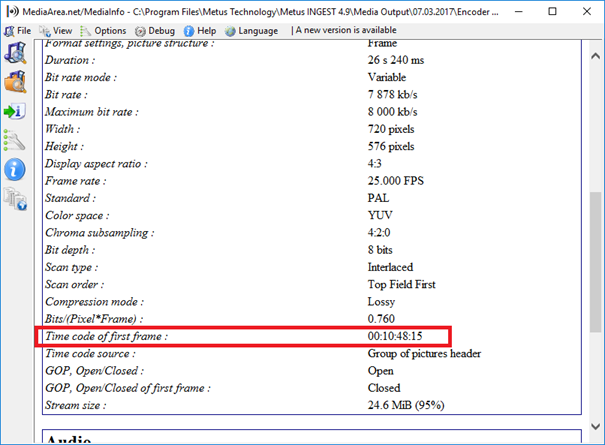
(In the created video file properties, you will be able to observe the timecode of the first frame)
NOTE: In order to starts all the encoders by available timecode source please open "Tools > Options > Capture Cards" menu and enable the “Synchronize Encoder Action by Available Time Code Source” settings.
If you are going to synchronize multi inputs this may not provide frame accurate synchronizing. External timecode cards provide better solution for frame accurate synchronizing. It is explained in "How to import Timecode (LTC) via External Timecode Card ?" menu.
This feature works with Decklink Cards only.
This feature supported by Metus INGEST 5.8.3.0 or later versions.
How To;
1) Run the Metus INGEST.
2) Go to "Tools > Options > Capture Cards" menu.
3) Select "System Audio Inputs (LTC only)" option from "Time Code Source" menu.
Adding an Encoder
4) Click the "Add Encoder" button.
5) From newly appeared window select a Decklink input as a video source.
6) From "Source Settings > Select LTC Audio Input" menu, please select the ASIO Channel input.
7) Click on "OK" button and continue with next step.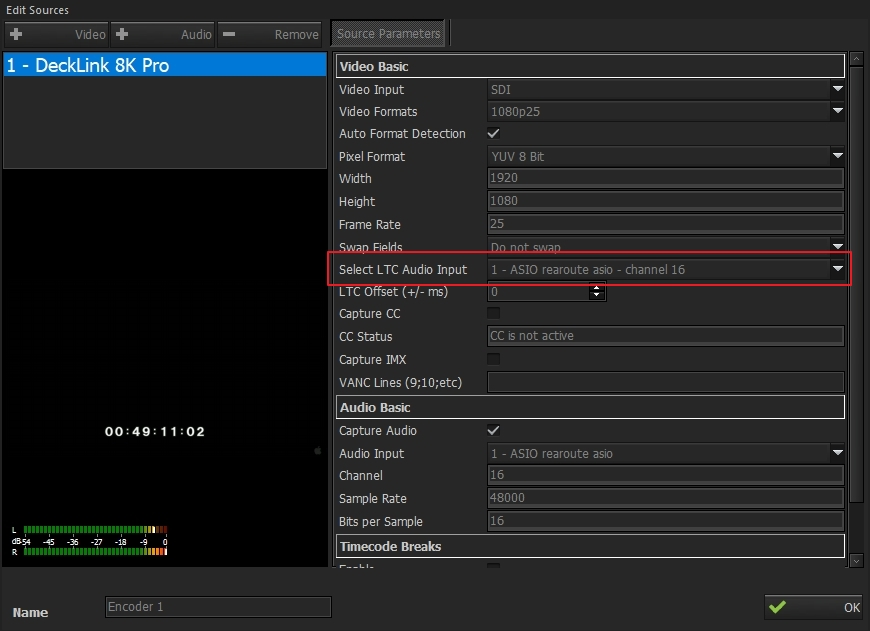
Adding a Profile and configuring preset settings.
8) Click on Profile menu and add a preset.
9) After you have added a preset, please go to "Compression > Time Code > TC Source" menu from the preset settings and select "Input TC" as a timecode source.
In order to observe the Timecode on the preview screen, please follow below instructions.
Adding a Timecode Preview.
1) Right click on "Encoder".
2) From newly appeared window select the "Settings" menu.
3) Open Encoder Settings.
4) Select Preview menu.
5) Select "External" timecode type from the "TC Type" drop down menu.
6) Click on "OK" button.
6) Timecode counter will appear on the left bottom corner of the encoder preview screen.