Schedule Mode - The Latest
The capture mode must be set to Schedule Mode to be able to record when you define the recording tasks as scheduled. It is shown below choosing Schedule Mode and its appearance on the Left Panel after choosing Schedule Mode.
Creating Scheduled Tasks
Scheduled recording tasks can be created with Metus Ingest Scheduler. The scheduled task will record the desired encoder in desired format itself according to your schedule task settings even you are not in front of computer.
To schedule a task;
Click the Scheduler Window on the bottom of the Metus Ingest Window. Scheduler Window appearance is shown below.
Click the Add button in the Scheduler Window. ( Add button is shown above. )
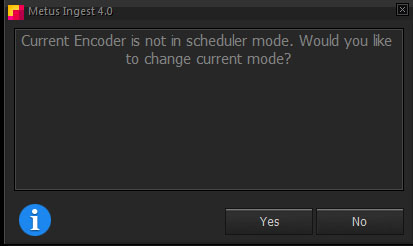
If capture mode isn't set to Scheduler Mode a pop-up window appears like the following:
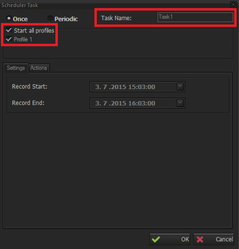
Click to Yes button for the scheduler mode. If you don’t click to Yes or No button, the Scheduler Task window will appear in a few seconds. Schedular Task Window is shown below.
A task name can be written to task name bar to make it easier to work with it.
As default, recording will be for all profiles that added to encoder. If desired, “Start all profiles” option can be unchecked and users may select whichever profiles they want.
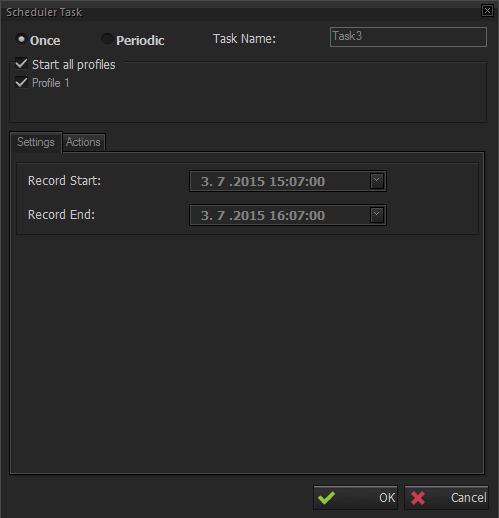
You have two choices for scheduling which are Once and Periodic .
Once
Settings
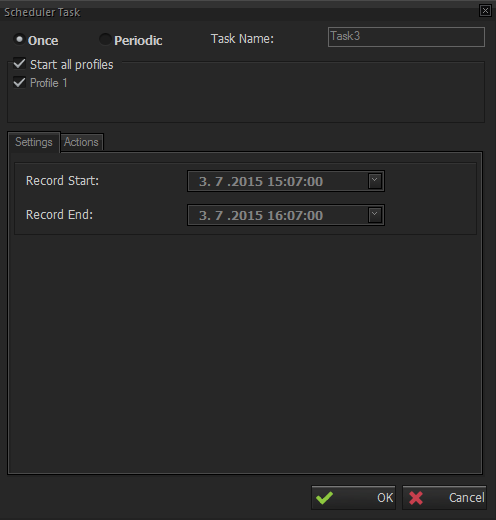
By choosing this schedule selection , you can set Recording Start/Stop Date and Time , the schedule task which you set is going to run only for once at the defined date and time. The recording will start and stop in between the desired start and stop interval only for once.
Periodic
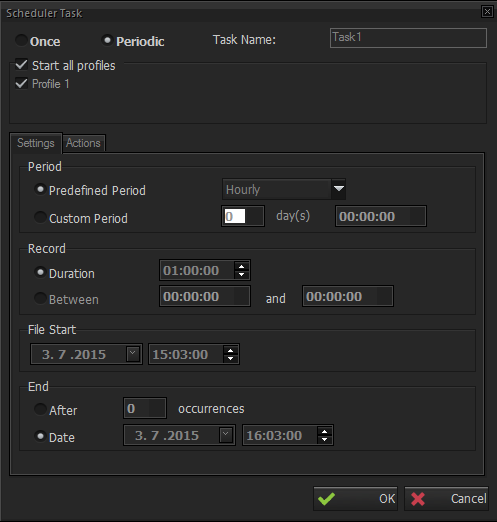
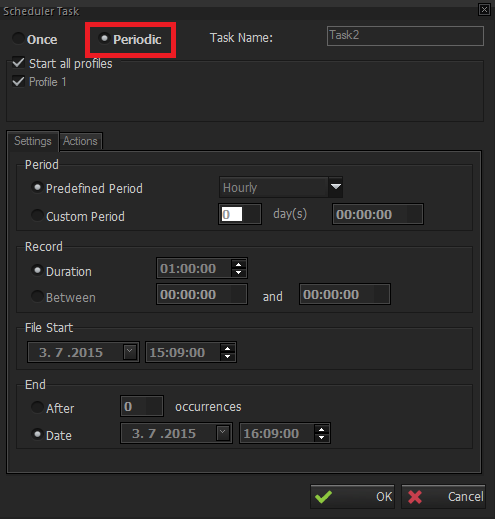
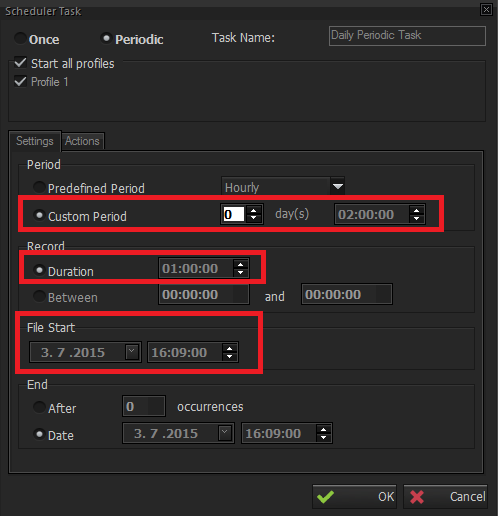
You can schedule a recording task that can start and stop at a definite date and time periodically. Appearance of the schedule task settings window when you choose Periodic section is shown below. You can adjust Period type , record duration , recording start and end date / time in this window.
Settings
Period
Predefined period
Hourly:It enables the scheduler to record hourly as much as the duration entered. Since it’s an hourly periodic schedule, time intervals cannot be defined.
Daily:It enables the scheduler to record daily as much as the duration entered or between the defined time intervals. Metus Ingest will start and stop recording.
Weekly:It enables the scheduler to record weekly as much as the duration entered or between the defined time intervals. Metus Ingest will start and stop recording in the defined day.
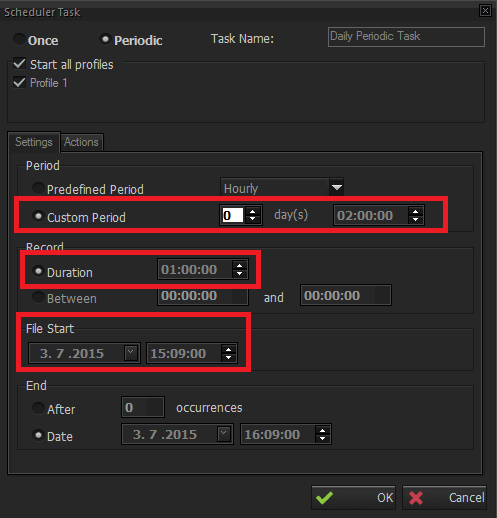
Custom Period:Any custom amount of time can be written here. (e.g. 2 days 10:00:00 means, encoding repeats after 2 days and 10 hours.)
Record Duration:It adjusts recording duration for scheduled task.
Between:It adjusts schedule task to record between setted times of source.
File Start:This date and time indicates when this schedule task will start to work. If duration value is given, recording starts immediately when the file start time comes.
If time intervals value is given instead of duration, scheduler task will start checking this time interval after file start date and time has come.
End:This option shows when the scheduler task will stop working. There are two options for this.
After:Occurrences amount can determine how many times scheduler task will work.
Date:Exact time and date can be stated to stop scheduler task.
Actions
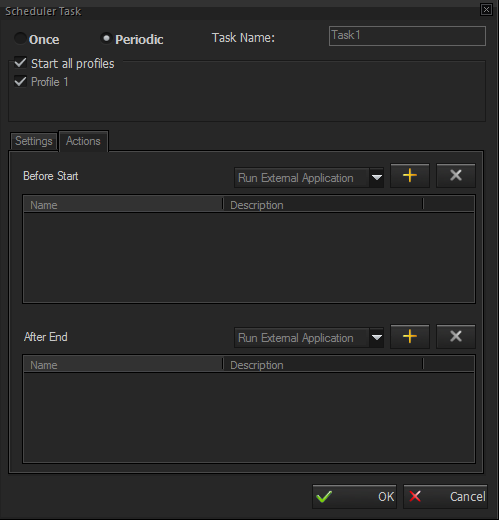
If any switcher control device is plugged in, action tab can be used to define some scheduler task according to this switcher. When settings of the task is done (once or periodic), by using actions tab any input of switcher can be selected to encode due to user’s need. Appearance of the Action tab is shown below.
Before Start:When once or periodic scheduler task is given, until the encoding time arrives, scheduler task do not change switcher control settings. Just before encoding time, scheduler task adjust switcher control as user demanded and starts encoding due to these adjustments.
After End:If any adjustment made at switcher control as after end, as soon as encoding stops,metus application adjust switcher control according to this settings. In periodic tasks, after end setting is applied every time after encoding stops.
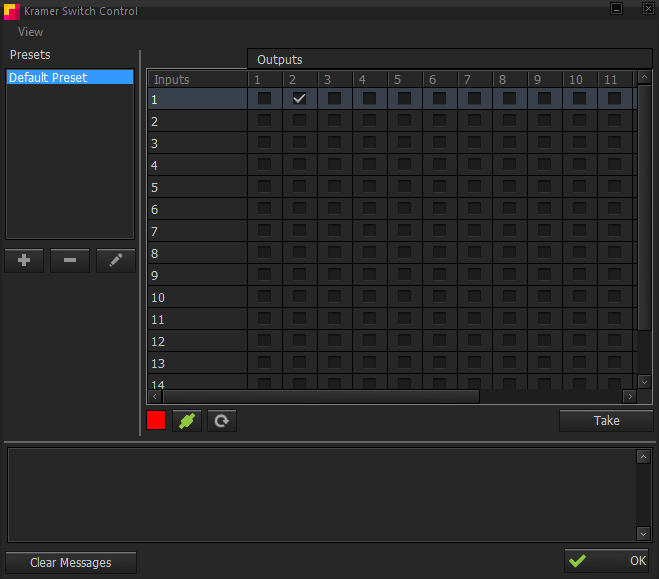
To adjust switcher settings, firstly the device which is connected to ingest machine should be selected. After that by pressing (add) button, a switcher setting window opens.
For more detailed information about switcher settings see Matrix (Router) Control .
Since scheduler task works only on this ingest application, only this ingest application’s output should be selected. That’s why, it’s recommended to use “only selected outputs” option from edit window and select this ingest. And it’s critically important that you must not add more than one switcher control except you have some special circumstances.
And if all scheduling task settings are done , by pressing OK button , this task starts.
The scheduled task appears on the Scheduler Tab as shown on the figure below.
Task Name and Duration columns are obvious. Next start column indicates when this task will start recording next. In this example 15:07:00 is the time and [03.07] is the date (03.07.2015). Remaining means how many times this task will record more. In this example, it is “1” so it will only record once because the task is not a periodic one. With a periodic example it would be like that;
This task would be like this:
Let’s suppose that, we need periodic non-stop encoding which is repeatedly from input-1 and input-2 for 1 hour duration each. This is a bit tricky that it cannot be prepared by one task only. Since two different inputs are needed for encoding, there should be two different tasks.
Remaining column automatically calculates how many times more it will start recording. In this case, it is 22 times. Every time it start recording, it decrease one by one until scheduler task has no more recording.
Input-1 will be encoded for 1 hour duration and 2 hours periodically, and same goes for input-2 but only difference is input-2 starts encoding 1 hour later than input-1. Let’s say input one starts its encoding at 13:00:00, it should be like that;
Each task’s switcher could controls should be adjusted from action tab according to these needs.
Suppose that the user defines two tasks as shown on the figures below. As you see, the recording times for the first and second tasks overlap with each other.
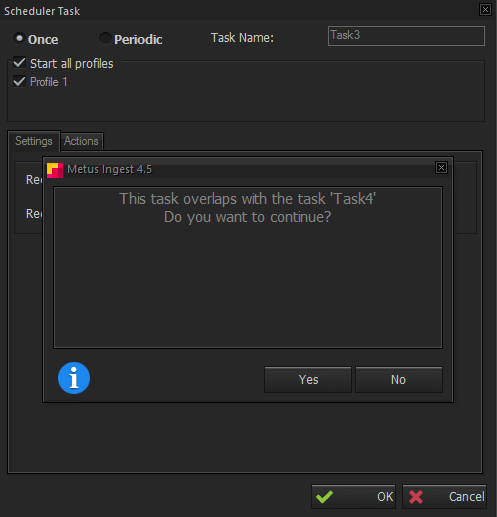
Therefore Ingest warns the user with the alert box as shown below. The user should click to No button to prevent the tasks from overlapping.
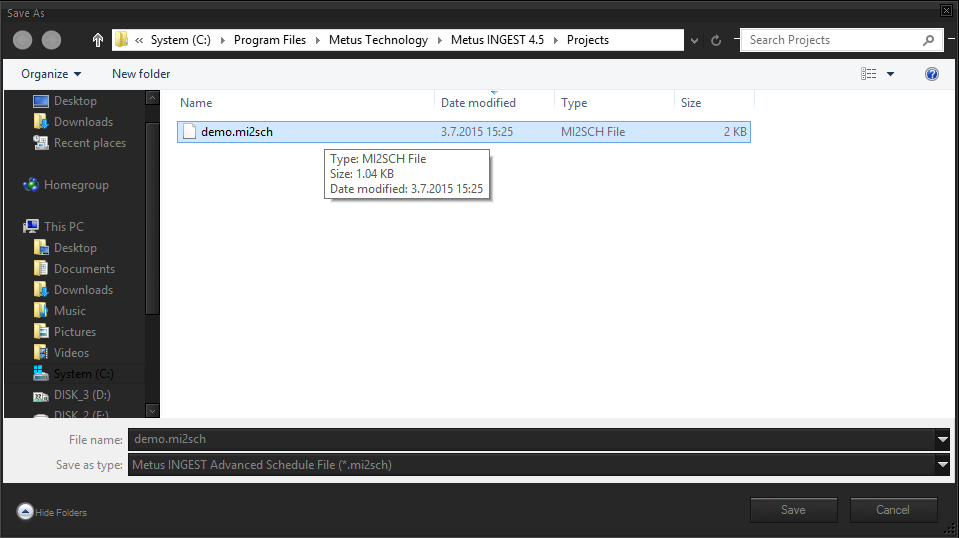
As shown on the figure below, the user saves the tasks as Metus Ingest Schedule File (demo.mi2sch). This XML file will be used to import the scheduled tasks to Ingest.
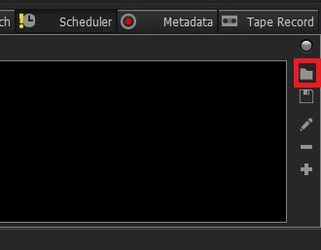
When the user decides to import the tasks to Ingest, he opens the XML file by pressing to <Load> button.
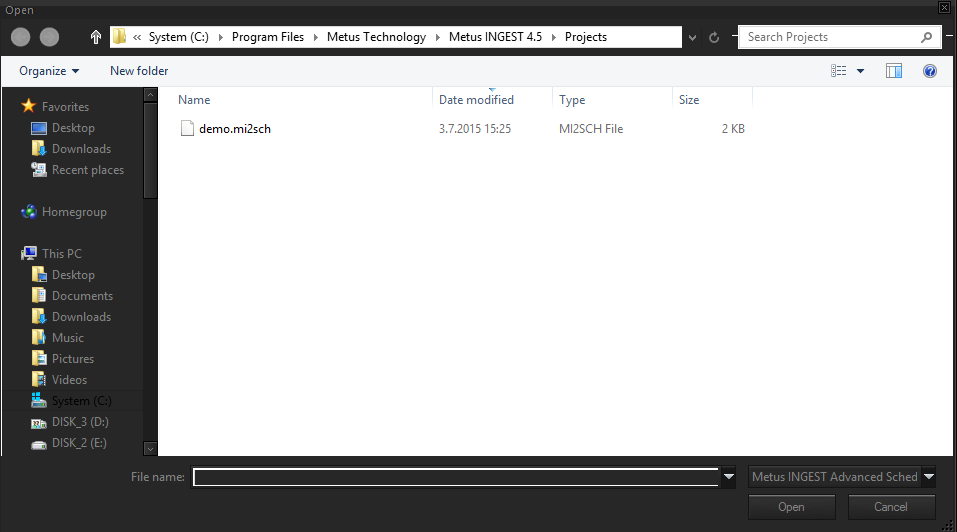
After the user selects the Schedule File and clicks to <Open> button, all the tasks appear on the Scheduler window.
Then, the user clicks to the big dot to enable the Scheduler as shown on the figure below.
Completing a Task
The states of the tasks turn to Completed state, whenever the recording for the second task finishes.
Scheduler Window
These are the symbols in scheduler window:
Lock button is for locking adding, editing or removing at schedule window. Green, open lock obviously means these actions are unlocked. Red closed lock means they are locked.
Note:To lock these actions, from options window security setting, schedule option must be checked first.
This button is for enabling or disabling all schedule tasks. Green button means, all tasks are enabled and if it is pressed it turns to blue and all tasks will be disabled.
Load button opens the folder skwhere the tas saved before. A project of task(s) can be added to schedule here. (Note that when a task project added, all tasks with it will be added but before that the current tasks will be removed.)
Save button, added task(s) can be saved as an xml file.
With this button any selected task can be edited. Double clicking over selected task does same action.
A new task can be added by clicking this button.
It removes any selected task.
ListTask Name:You can see Scheduled Task's Name in here.
Next Start:You can see the next start time and date of the scheduled record.
Duration:You can see the scheduled duration.
Remaining:It means how many times this task will record.
Timeline
From timeline bar, periodic recordings can be examined more easily. It can help to prevent creating different periodic task that crosses each other. A beginning date and ending date can be selected to focus on the days that are desired.


