| Expand | ||
|---|---|---|
| ||
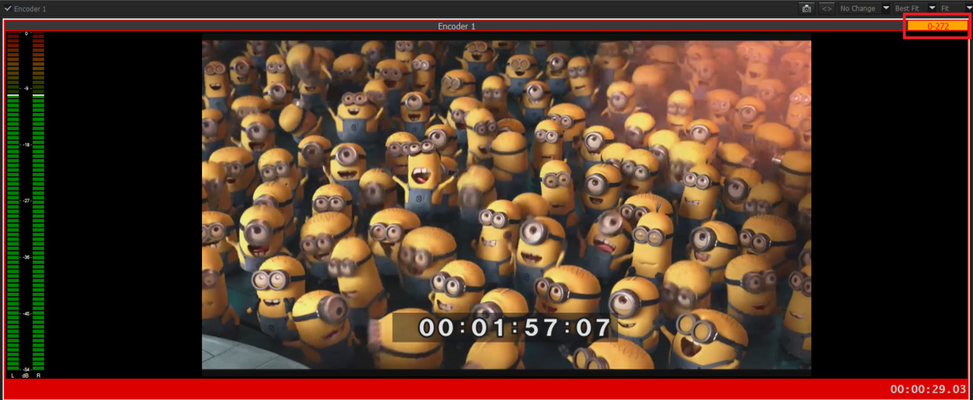
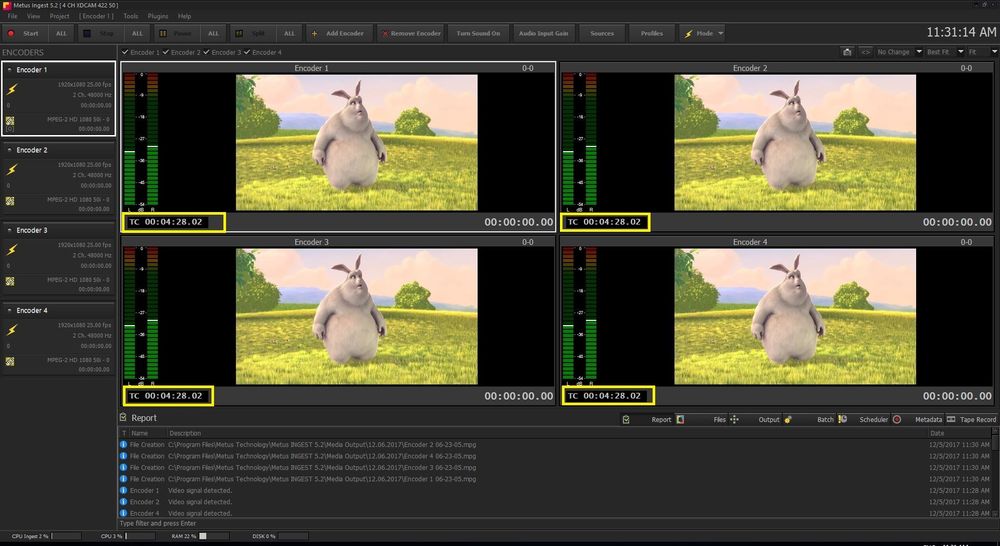
If capture system gets behind the real-time capture for specified video format configuration, encoder starts to buffer frames. Orange label is warning appears when 100 or more frames added in queue. This might happen sometimes when computer is processing another task while capture continues. But if the count rises continuously, it means system is incapable for real-time capture of specified configuration. Buffer count will rise until it fills adjusted percent of the the physical RAM (Default adjustment is %80) and then system will start dropping frames in order to keep up the real-time capture.
The causes of this rise could be either one or more of the following;
|
...
| Expand | ||
|---|---|---|
| ||
This error occurs when volume names on the PC are the same and also when the wrapper in use is MOV (Quicktime). For example, partitions D: and F: both have the same name. You need to change one of the volume names. |
| Expand | ||
|---|---|---|
| ||
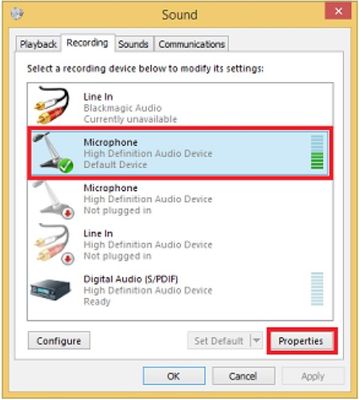
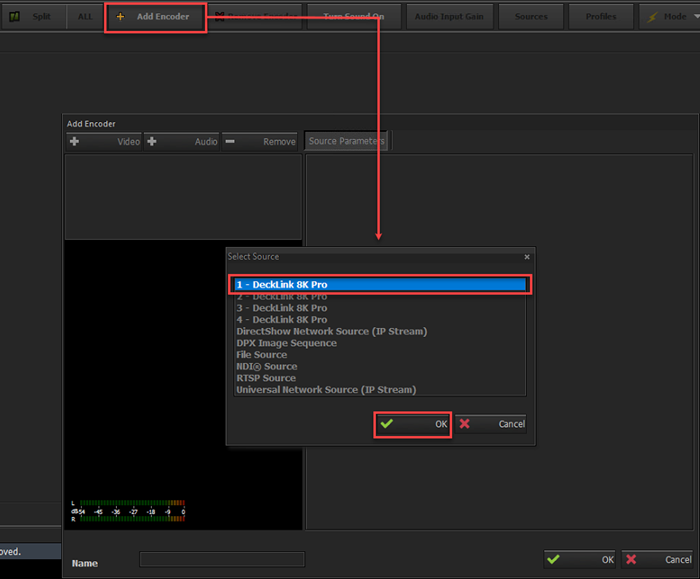
If you are going to synchronize multi inputs this may not provide frame accurate synchronizing. External timecode cards provide better solution for frame accurate synchronizing. It is explained in "How to import Timecode (LTC) via External Timecode Card ?" question. This feature works with Decklink Cards only. How To 1) Plug the cable coming from the timecode source to the computer's microphone input.
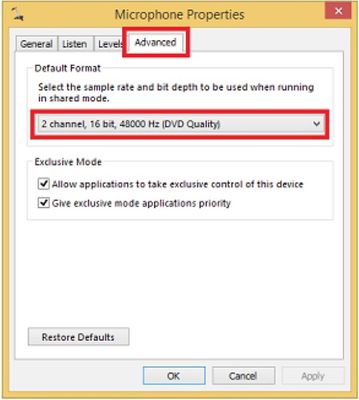
3) Go to the Advanced tab. Select the "2 Channel, 16 bit, 48000 Hz (DVD Quality)" from "Default Format" menu.
Configuring Timecode Settings.4) Run the Metus INGEST.
Adding an Encoder.7) Click the "Add Encoder" button.
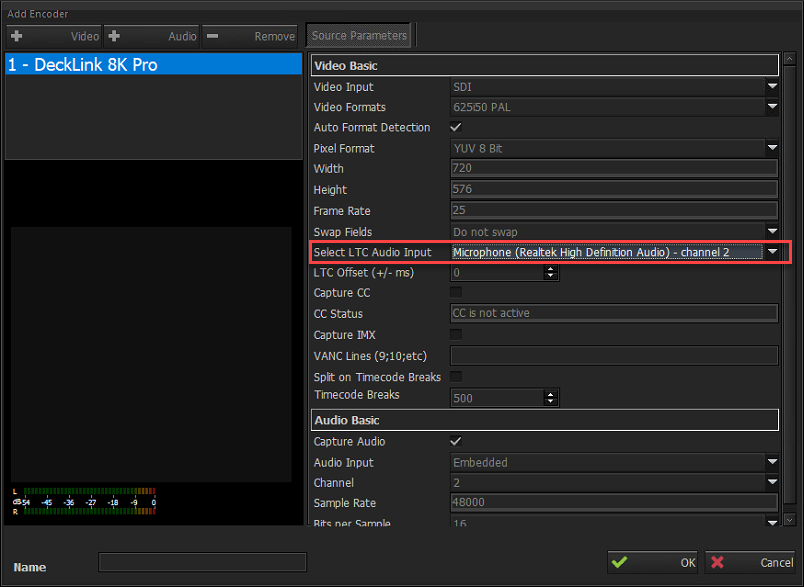
9) From "Source Settings > Select LTC Audio Input" menu, please select the microphone input.
Adding a Profile and configuring preset settings.10) Click on Profile menu and add a preset.
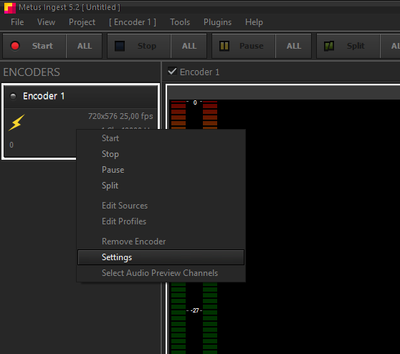
In order to observe the Timecode on the preview screen, please follow below instructions. Adding a Timecode Preview.1) Right click on "Encoder". 2) From newly appeared window select the "Settings" menu. 3) Open Encoder Settings.
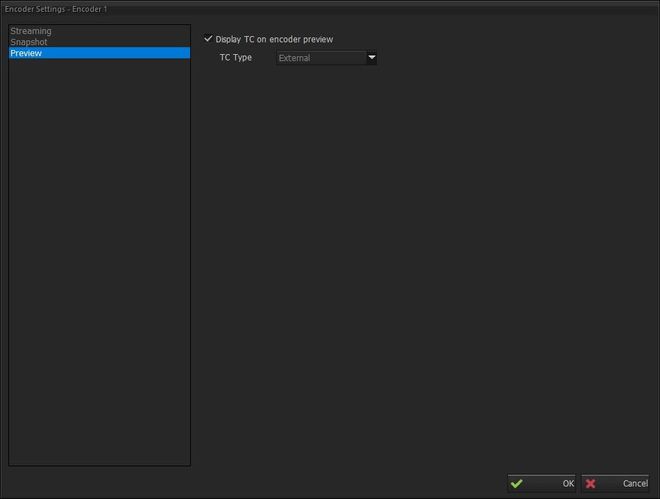
4) Select Preview menu. 5) Select "External" timecode type from the "TC Type" drop down menu. 6) Click on "OK" button.
6) Timecode counter will appear on the left bottom corner of the encoder preview screen.
|

| Expand | ||
|---|---|---|
| ||
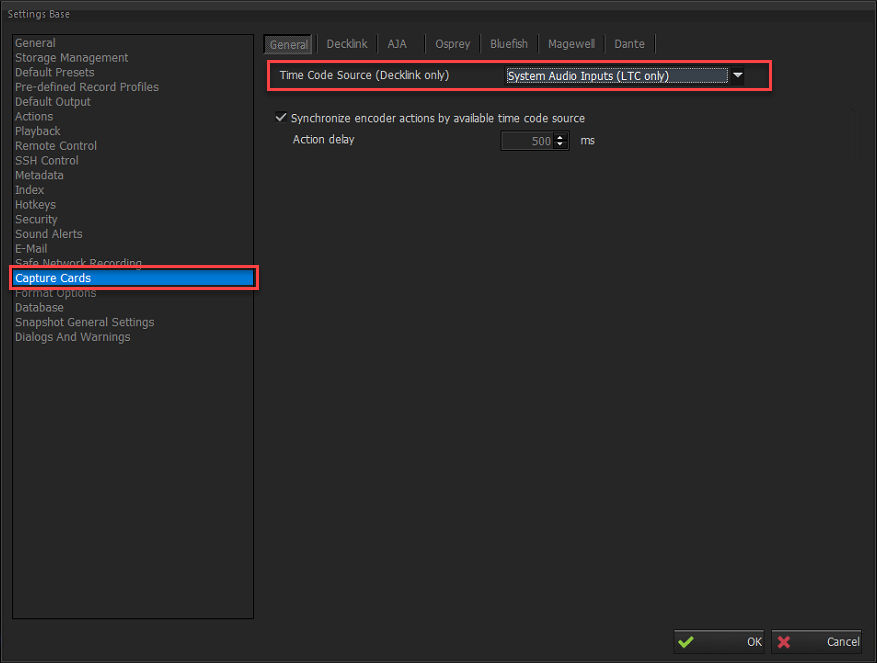
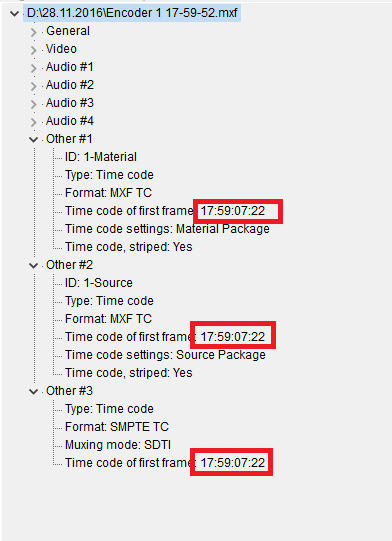
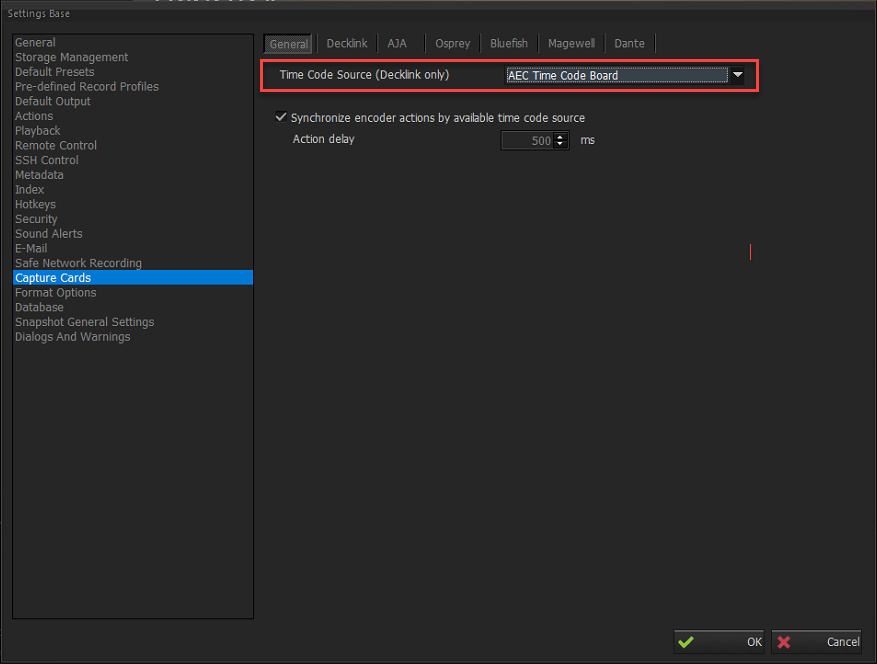
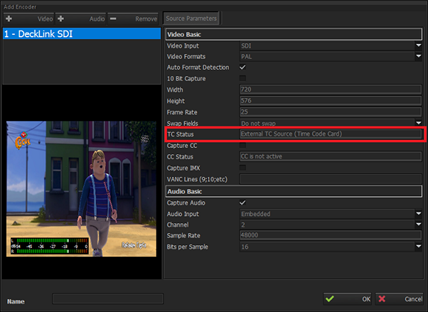
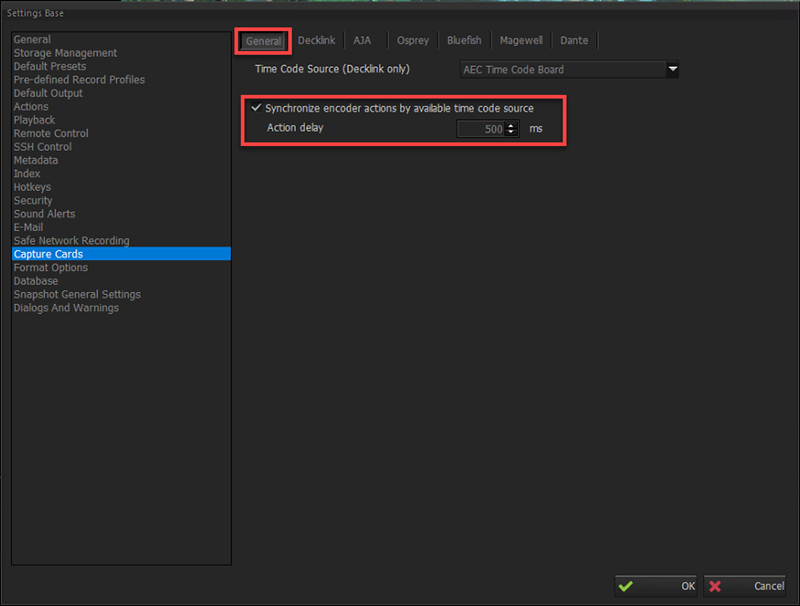
Configuring Timecode SettingsThis feature works with Decklink Cards only. Step 1. Run Metus INGEST. Step 2. Go to "Tools > Options > Capture Cards" menu. Step 3. From the Capture Cards menu please select “AEC Time Code Board” as a timecode source. Step 4. In order to apply settings click “OK” button.
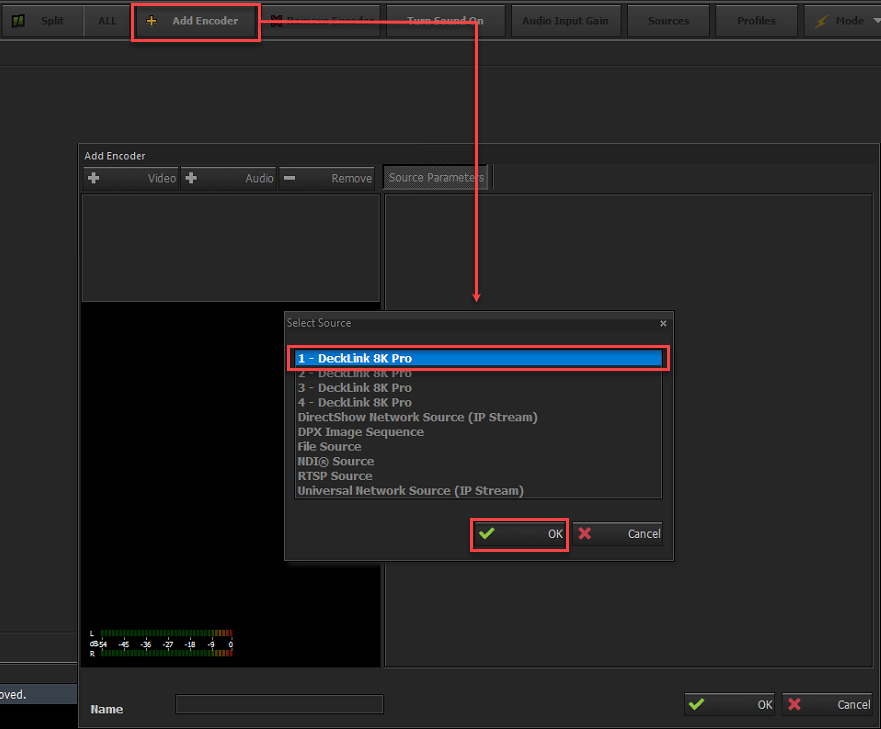
Adding an EncoderStep 5. Click the "Add Encoder" button Step 6. From newly appeared window select a Decklink card as a video source. Step 7. Click on “OK” button to add the video signal.
* On the next window the timecode status will appear on the source settings as an “External TC Source (Time Code Card)”.
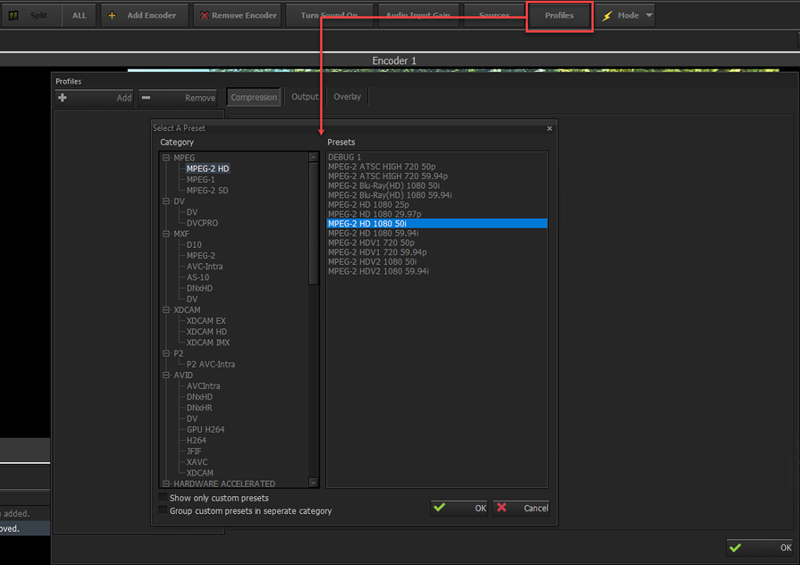
Step 8. To continue to configure the next settings click on “OK” button. Adding a Profile and configuring preset settings.Step 9. Click the "Profile" button and add a preset from the list.
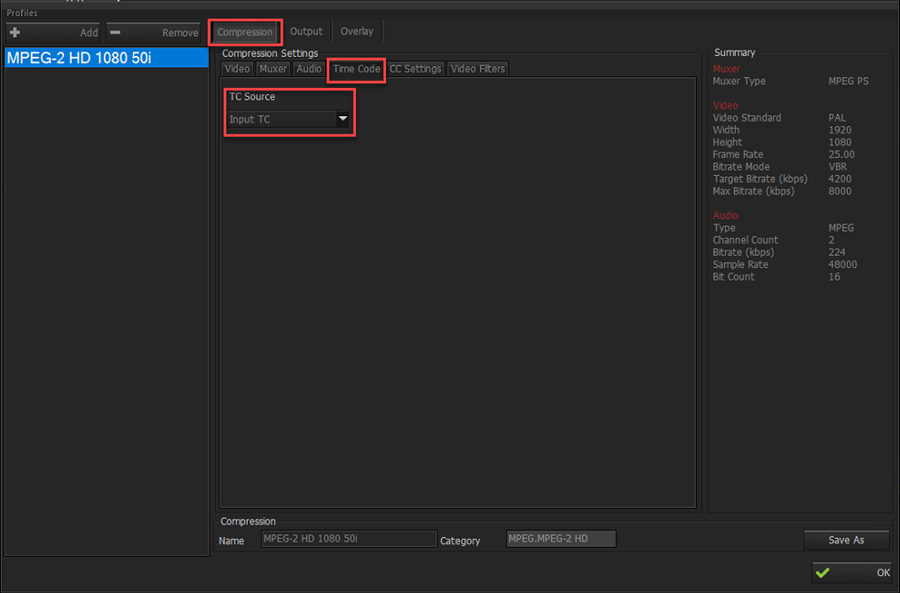
Step 10. After you have added a preset, please go to "Compression > Time Code > TC Source" menu from the preset settings and select "Input TC" as a timecode source. Step 11. In order to apply the settings click “OK” button.
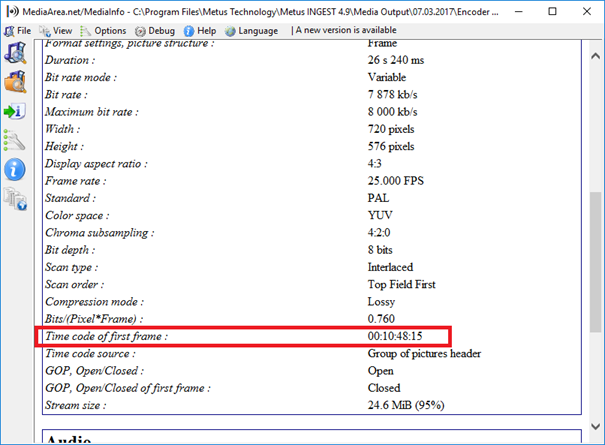
(In the created video file properties, you will be able to observe the timecode of the first frame)
NOTE: In order to starts all the encoders by available timecode source please open "Tools > Options > Capture Cards" menu and enable the “Synchronize Encoder Action by Available Time Code Source” settings.
|
...
| Expand | ||
|---|---|---|
| ||
Blackmagic Decklink: External timecode card is needed. The card must be Adrienne Timecode card (PCIe-LTC/RDR-PCIe-VLTC/RDA-AEC-PCIe-41). Deltacast: Natively supported on reference input; or can be added through a companion LTC card (option) http://www.deltacast.tv/products/developer-products/accessories/a-ltc-1 AJA: Many AJA cards have built-in LTC input. So external/companion card is not needed |
| Expand | ||
|---|---|---|
| ||
Yes its possible AVC intra, we check with ProRes and the bit depth have to be 16 bits. |
...