Overlay Settings - 4.0.1.3
It is possible to burn in image, logo, text, date, time, time code over the video for each recording formats and you can see it on preview screen . Overlay can be controlled and changed from remote TCP commands.
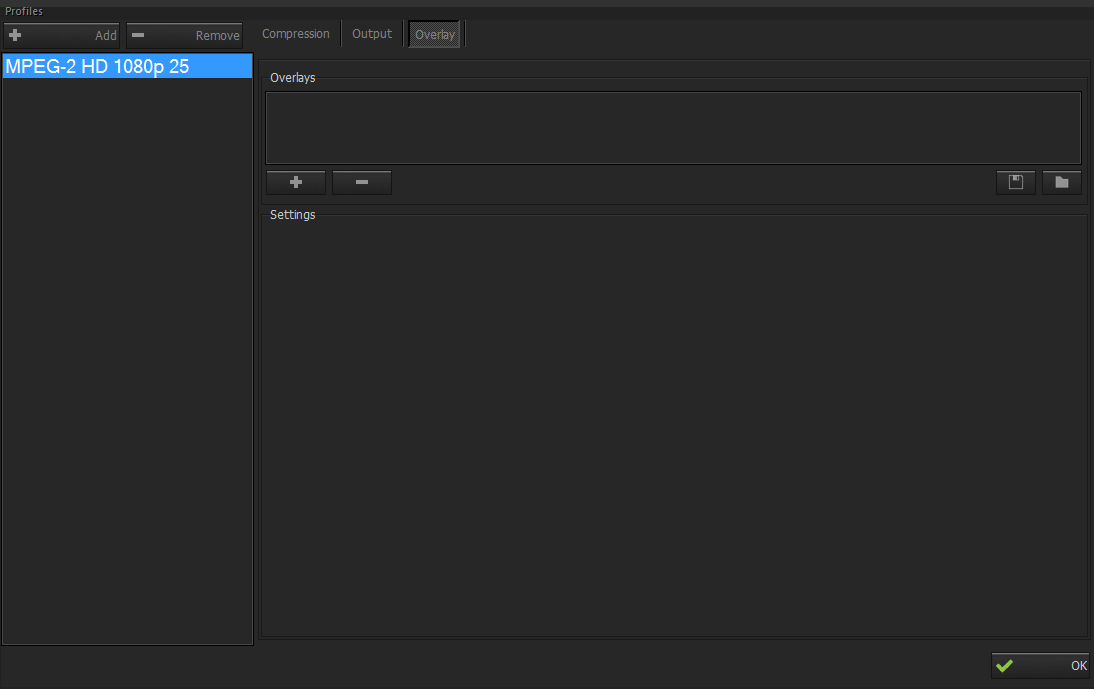
Overlay settings used for the encoding (burned in captured video) profiles can be seen below.
 This button adds a new overlay.
 This button removes the chosen overlay item.
 This button saves the overlay setting to a xml file which is currently set.
 By this button, an overlay can be added which is set by user.
Adding Overlay
By clicking this button three selections appear for adding overlay as it shown below ;
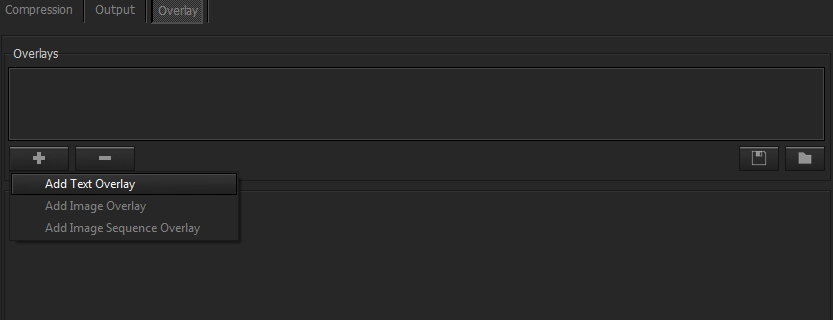
Text Overlay
- Edit Profiles > Choose the profile which you want to add overlay > click Overlay tab
- Click this button , then click Add Text Overlay section, following settings appear as it seen below.
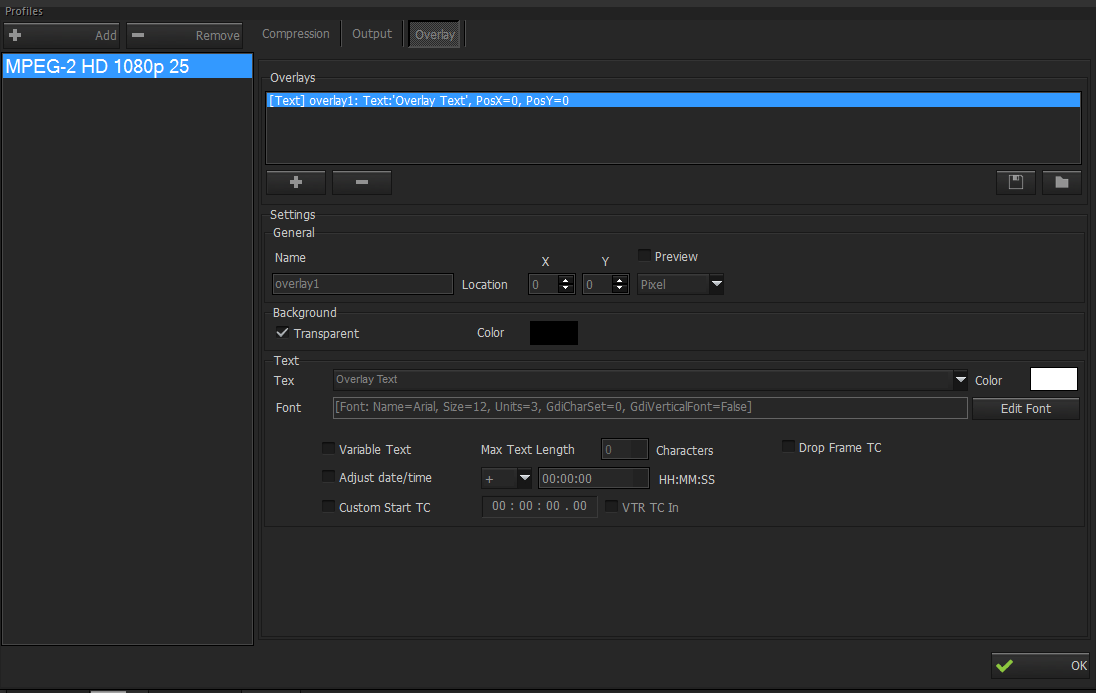
- Name: name of the overlay item. If the overlay is variable this name tag will be used for changing the overlay remotely using Metus Ingest TCP commands.
- Location: X and Y location for the overlay region on video. X and Y values can be either pixel or percent relative to top-left corner of the video. ( Pixel / Percent )
- If preview option is checked then the overlay will be visible in preview screen. Checking the preview option will put a separate overlay region on source of the encoder. Since overlay function edits each frame and makes some modification to the video, this option is not recommended to use unless it is required in workflow.
- If the location is pixel then the preview and the encoded video overlay can be at different position of the video in case if the encoded video size is different from source.
- Background
Transparent : ignores the background color of the overlay.
Color : Background color of the overlay region.
- Text
Text : The overlay text which will appear on video. Predefined tags can be used for dynamic overlay such as _date, _ time, etc.
For example for burning time code info ; _time_frame or _time_frame_zero should be selected from the drop down menu.
Color : Text color.
Font : Font of the overlay text.
Variable Text : This option is available when there is no tag in text field. Variable option is used to change the text of current overlay from remote TCP commands. This option is useful when there is a need to dynamically change the overlay text such as camera angle etc.
Max Text Length : This option is used with Variable Text option and shows max text characters for current overlay item.
Adjust date/time : Date/Time parameters can be changed according to different time zones.
Custom Start TC : a user defines start time code for overlay.
VTR TC in : VTR RS 422 time code.
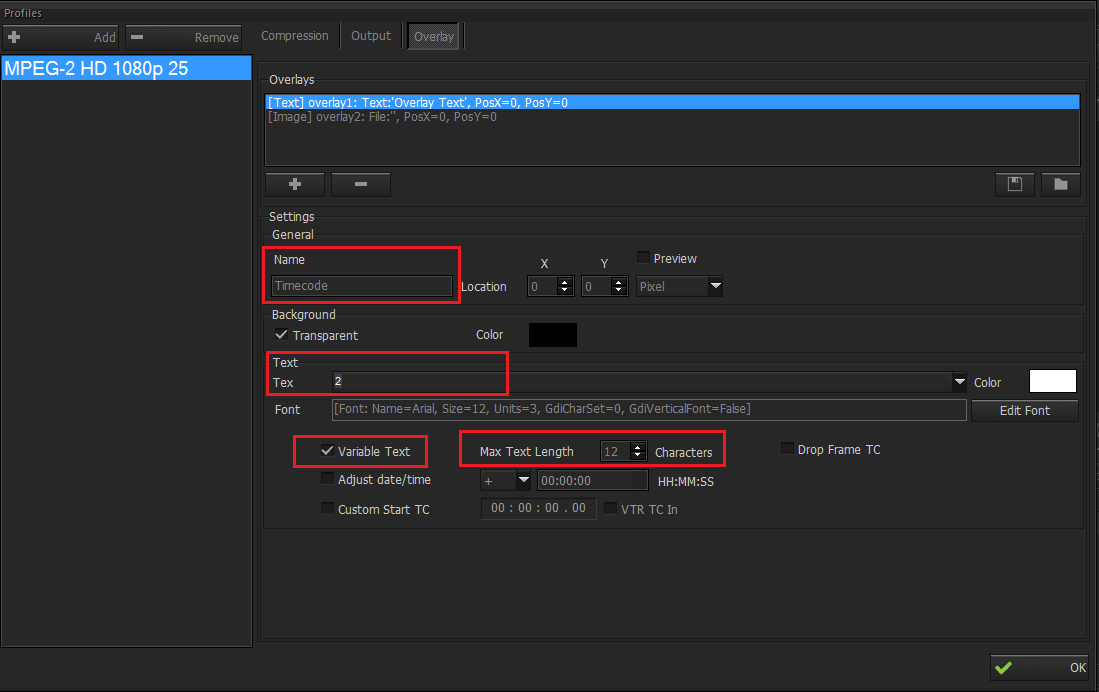
- Putting VITC/LTC Time Code on Video Overlay
VITC or LTC time code overlay is set according to below indications.
1- Name : _timecode
2- Text : (no text)
3- Variable Text checked
4- Max Length 12 Char
Image Overlay
- Edit Profiles > Choose the profile which you want to add overlay > click Overlay tab
 Click this button , then click Add Image Overlay section, following settings appear as it seen below.
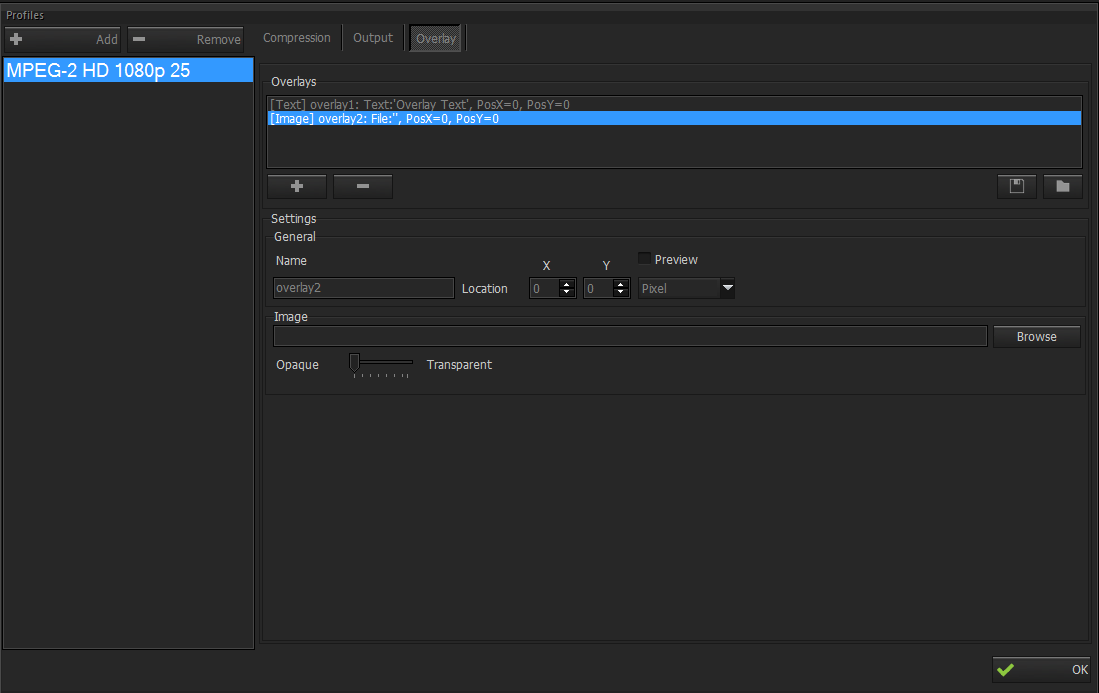
- Name : name of the overlay item. If the over is variable this name tag will be used for changing the overlay remotely using Metus Ingest TCP commands.
- Location : X and Y location for the overlay region on video. X and Y values can be either pixel or percent relative to top-left corner of the video. ( Pixel / Percent )
- If preview option is checked then the overlay will be visible in preview screen. Checking the preview option will put a separate overlay region on source of the encoder. Since overlay function edits each make some modification to the video this option is not recommended to use unless it is required in workflow.
- If the location is pixel then the preview and the encoded video overlay can be at different position of the video in case if the encoded video size is different from source.
- Image : the image that will be used as overlay image. It is recommended that the Image to be used to be 32-bit PNG with transparency.
- Opaque and Transparent : option can be set for the transparency of the image on video.
Image Sequence Overlay
- Edit Profiles > Choose the profile which you want to add overlay > click Overlay tab
- Click this button , then click Add Image Sequence Overlay section, following settings appear as it seen below.
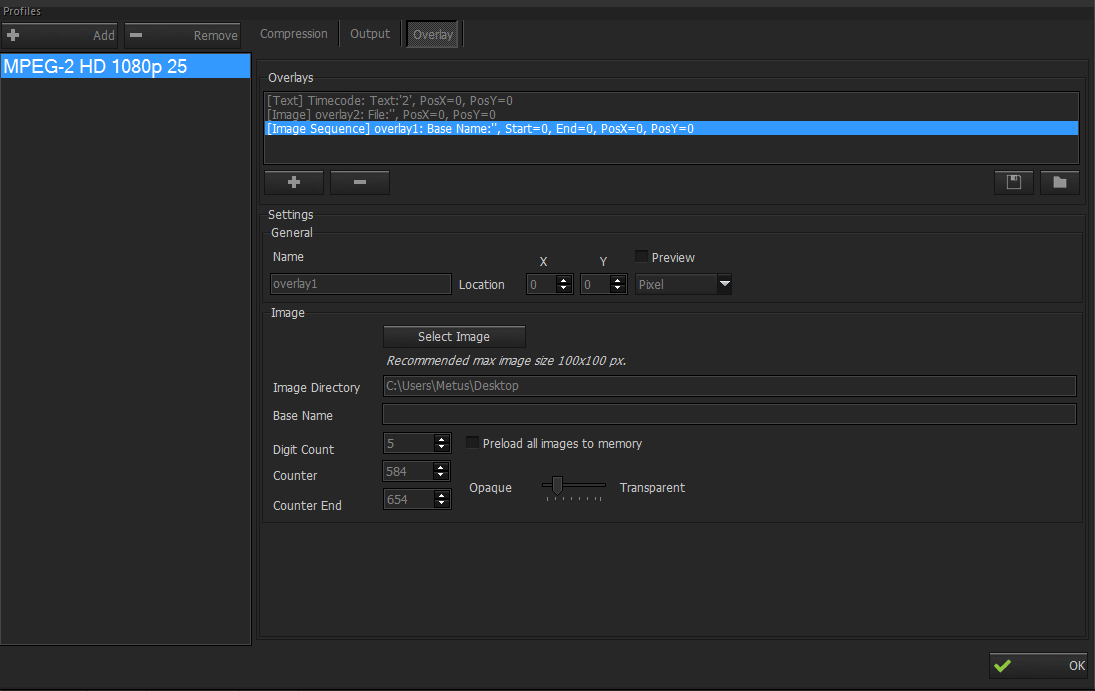
- Name : name of the overlay item. If the over is variable this name tag will be used for changing the overlay remotely using Metus Ingest TCP commands.
- Location : X and Y location for the overlay region on video. X and Y values can be either pixel or percent relative to top-left corner of the video. ( Pixel / Percent )
- If preview option is checked then the overlay will be visible in preview screen. Checking the preview option will put a separate overlay region on source of the encoder. Since overlay function edits each make some modification to the video this option is not recommended to use unless it is required in workflow.
- If the location is pixel then the preview and the encoded video overlay can be at different position of the video in case if the encoded video size is different from source.
- Image
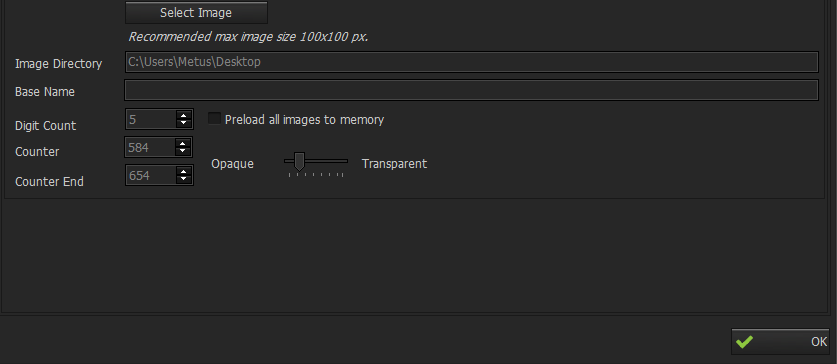
Select Image : This button opens a folder browser where one of a series of image should be selected from a folder. All the images should end with some number and they all should have same digit amount. (E.g. logo_0001 logo_0002 logo_0003 etc…) It’s recommended that image size should be 100x100 pixels maximum. When an image file is selected, application automatically fills other parts automatically, though users can adjust these settings due their needs.
Image Directory : Image directory shows the folder path of the image folder. This is intended to give information only therefore it is not editable. If directory change is needed, it can be change from select image button.
Base Name : Name of the all images without digits is given.
Counter Start : Users can write the number of image which they want to start the sequence.
Counter End : Users can write the number of image which they want to end the sequence.
Preload all images to memory : This option loads all images to memory before encoding so that it prevents any delay of reading files. However, if the image sizes are high and/or there are too many images this option may cause to increase buffer of ingest too much. Therefore preloading images to memory is optional.
Opaque – Transparent : Level of transparency can be adjusted from this tool.

